 wehub-resource-sync
102 lines
4.5 KiB
Markdown
102 lines
4.5 KiB
Markdown
<!-- WEHUB_ZH_README -->
|
||
> [!NOTE]
|
||
> 本文档由 WeHub 基于上游 README 翻译整理,属于社区翻译,非官方中文文档。
|
||
> [English](./README.en.md) · [原始项目](https://github.com/GLips/Figma-Context-MCP) · [上游 README](https://github.com/GLips/Figma-Context-MCP/blob/HEAD/README.md)
|
||
> 原作者、版权与许可证归属以原始项目及本仓库 LICENSE 文件为准。
|
||
|
||
<a href="https://www.framelink.ai/?utm_source=github&utm_medium=referral&utm_campaign=readme" target="_blank" rel="noopener">
|
||
<picture>
|
||
<source media="(prefers-color-scheme: dark)" srcset="https://www.framelink.ai/github/HeaderDark.png" />
|
||
<img alt="Framelink" src="https://www.framelink.ai/github/HeaderLight.png" />
|
||
</picture>
|
||
</a>
|
||
|
||
<div align="center">
|
||
<h1>Framelink MCP for Figma</h1>
|
||
<h3>让你的编程智能体访问 Figma 数据。<br/>一次性在任何框架中实现设计。</h3>
|
||
<a href="https://npmcharts.com/compare/figma-developer-mcp?interval=30">
|
||
<img alt="每周下载量" src="https://img.shields.io/npm/dm/figma-developer-mcp.svg">
|
||
</a>
|
||
<a href="https://github.com/GLips/Figma-Context-MCP/blob/main/LICENSE">
|
||
<img alt="MIT License" src="https://img.shields.io/github/license/GLips/Figma-Context-MCP" />
|
||
</a>
|
||
<a href="https://framelink.ai/discord">
|
||
<img alt="Discord" src="https://img.shields.io/discord/1352337336913887343?color=7389D8&label&logo=discord&logoColor=ffffff" />
|
||
</a>
|
||
<br />
|
||
<a href="https://twitter.com/glipsman">
|
||
<img alt="Twitter" src="https://img.shields.io/twitter/url?url=https%3A%2F%2Fx.com%2Fglipsman&label=%40glipsman" />
|
||
</a>
|
||
</div>
|
||
|
||
<br/>
|
||
|
||
通过此 [Model Context Protocol](https://modelcontextprotocol.io/introduction)(MCP)服务器,让 [Cursor](https://cursor.sh/)) 及其他 AI 驱动的编程工具访问你的 Figma 文件。
|
||
|
||
当 Cursor 能够访问 Figma 设计数据时,相比粘贴截图等替代方案,它在一次性(one-shot)准确实现设计方面**好得多**。
|
||
|
||
<h3><a href="https://www.framelink.ai/docs/quickstart?utm_source=github&utm_medium=referral&utm_campaign=readme">查看快速入门说明 →</a></h3>
|
||
|
||
## 演示
|
||
|
||
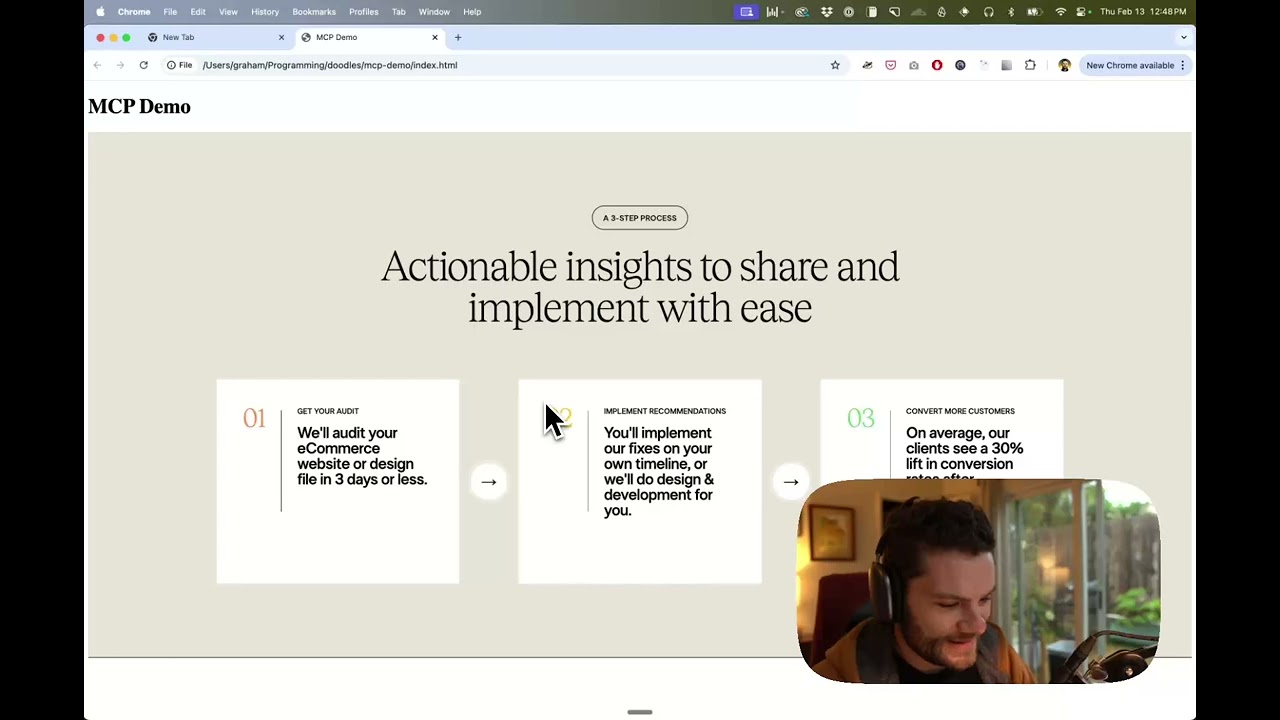
[观看在 Cursor 中使用 Figma 设计数据构建 UI 的演示](https://youtu.be/6G9yb-LrEqg)
|
||
|
||
[](https://youtu.be/6G9yb-LrEqg)
|
||
|
||
## 工作原理
|
||
|
||
1. 打开 IDE 的聊天界面(例如 Cursor 中的 agent 模式)。
|
||
2. 粘贴 Figma 文件、画框(frame)或群组(group)的链接。
|
||
3. 让 Cursor 对 Figma 文件执行操作——例如实现该设计。
|
||
4. Cursor 将从 Figma 获取相关元数据,并用其编写你的代码。
|
||
|
||
此 MCP 服务器专为与 Cursor 配合使用而设计。在基于 [Figma API](https://www.figma.com/developers/api), 的上下文进行响应之前,它会简化并转换响应,从而仅向模型提供最相关的布局与样式信息。
|
||
|
||
减少提供给模型的上下文量,有助于提高 AI 的准确性并使响应更加贴合需求。
|
||
|
||
## 快速入门
|
||
|
||
许多代码编辑器及其他 AI 客户端都使用配置文件来管理 MCP 服务器。
|
||
|
||
可通过在配置文件中添加以下内容来配置 `figma-developer-mcp` 服务器。
|
||
|
||
> 注意:你需要创建 Figma 访问令牌(access token)才能使用此服务器。有关如何创建 Figma API 访问令牌的说明请参阅[此处](https://help.figma.com/hc/en-us/articles/8085703771159-Manage-personal-access-tokens).
|
||
|
||
### MacOS / Linux
|
||
|
||
```json
|
||
{
|
||
"mcpServers": {
|
||
"Framelink MCP for Figma": {
|
||
"command": "npx",
|
||
"args": ["-y", "figma-developer-mcp", "--figma-api-key=YOUR-KEY", "--stdio"]
|
||
}
|
||
}
|
||
}
|
||
```
|
||
|
||
### Windows
|
||
|
||
```json
|
||
{
|
||
"mcpServers": {
|
||
"Framelink MCP for Figma": {
|
||
"command": "cmd",
|
||
"args": ["/c", "npx", "-y", "figma-developer-mcp", "--figma-api-key=YOUR-KEY", "--stdio"]
|
||
}
|
||
}
|
||
}
|
||
```
|
||
|
||
或者,你可以在 `env` 字段中设置 `FIGMA_API_KEY` 和 `PORT`。
|
||
|
||
如需了解更多关于如何配置 Framelink MCP for Figma 的信息,请参阅 [Framelink 文档](https://www.framelink.ai/docs/quickstart?utm_source=github&utm_medium=referral&utm_campaign=readme).
|
||
|
||
## Star 历史
|
||
|
||
<a href="https://star-history.com/#GLips/Figma-Context-MCP"><img src="https://api.star-history.com/svg?repos=GLips/Figma-Context-MCP&type=Date" alt="Star History 图表" width="600" /></a>
|
||
|
||
## 了解更多
|
||
|
||
Framelink MCP for Figma 简洁而强大。访问 [Framelink](https://framelink.ai?utm_source=github&utm_medium=referral&utm_campaign=readme) 网站了解更多,以充分发挥其作用。
|