 wehub-resource-sync
115 lines
3.5 KiB
Markdown
115 lines
3.5 KiB
Markdown
---
|
|
orphan: true
|
|
---
|
|
|
|
(serve-object-detection-tutorial)=
|
|
|
|
# Building a Real-time Object Detection Service with Ray Serve
|
|
|
|
## Overview
|
|
|
|
This tutorial demonstrates how to deploy a production-ready object detection service using Ray Serve. You will learn how to serve a YOLOv5 object detection model efficiently with automatic GPU resource management and scaling capabilities.
|
|
|
|
|
|
## Installation
|
|
|
|
Install the required dependencies:
|
|
|
|
```bash
|
|
pip install "ray[serve]" requests torch pillow numpy opencv-python-headless pandas "gitpython>=3.1.30"
|
|
```
|
|
|
|
## Implementation
|
|
|
|
This example uses the [ultralytics/yolov5](https://github.com/ultralytics/yolov5) model for object detection and [FastAPI](https://fastapi.tiangolo.com/) for creating the web API.
|
|
|
|
### Code Structure
|
|
|
|
Save the following code to a file named `object_detection.py`:
|
|
|
|
```{literalinclude} ../doc_code/object_detection.py
|
|
:language: python
|
|
:start-after: __example_code_start__
|
|
:end-before: __example_code_end__
|
|
```
|
|
|
|
The code consists of two main deployments:
|
|
1. **APIIngress**: A FastAPI-based frontend that handles HTTP requests
|
|
2. **ObjectDetection**: The backend deployment that loads the YOLOv5 model and performs inference on GPU
|
|
|
|
:::{note}
|
|
**Understanding Autoscaling**
|
|
|
|
The configuration in this example sets `min_replicas` to 0, which means:
|
|
- The deployment starts with no `ObjectDetection` replicas
|
|
- Ray Serve creates replicas only when requests arrive
|
|
- After a period of inactivity, Ray Serve scales down the replicas back to 0
|
|
- This "scale-to-zero" capability helps conserve GPU resources when the service isn't being actively used
|
|
:::
|
|
|
|
## Deployment
|
|
|
|
Deploy the service with:
|
|
|
|
```bash
|
|
serve run object_detection:entrypoint
|
|
```
|
|
|
|
When successfully deployed, you should see log messages similar to:
|
|
|
|
```text
|
|
(ServeReplica:ObjectDection pid=4747) warnings.warn(
|
|
(ServeReplica:ObjectDection pid=4747) Downloading: "https://github.com/ultralytics/yolov5/zipball/master" to /home/ray/.cache/torch/hub/master.zip
|
|
(ServeReplica:ObjectDection pid=4747) YOLOv5 🚀 2023-3-8 Python-3.9.16 torch-1.13.0+cu116 CUDA:0 (Tesla T4, 15110MiB)
|
|
(ServeReplica:ObjectDection pid=4747)
|
|
(ServeReplica:ObjectDection pid=4747) Fusing layers...
|
|
(ServeReplica:ObjectDection pid=4747) YOLOv5s summary: 213 layers, 7225885 parameters, 0 gradients
|
|
(ServeReplica:ObjectDection pid=4747) Adding AutoShape...
|
|
2023-03-08 21:10:21,685 SUCC <string>:93 -- Deployed Serve app successfully.
|
|
```
|
|
|
|
|
|
|
|
## Troubleshooting
|
|
|
|
:::{tip}
|
|
**Common OpenCV Error**
|
|
|
|
You might encounter this error when running the example:
|
|
|
|
```
|
|
ImportError: libGL.so.1: cannot open shared object file: No such file or directory
|
|
```
|
|
|
|
This typically happens when running `opencv-python` in headless environments like containers. The solution is to use the headless version:
|
|
|
|
```bash
|
|
pip uninstall opencv-python; pip install opencv-python-headless
|
|
```
|
|
:::
|
|
|
|
## Testing the Service
|
|
|
|
Once the service is running, you can test it with the following Python code:
|
|
|
|
```python
|
|
import requests
|
|
|
|
# Sample image URL for testing
|
|
image_url = "https://ultralytics.com/images/zidane.jpg"
|
|
|
|
# Send request to the object detection service
|
|
resp = requests.get(f"http://127.0.0.1:8000/detect?image_url={image_url}")
|
|
|
|
# Save the annotated image with detected objects
|
|
with open("output.jpeg", 'wb') as f:
|
|
f.write(resp.content)
|
|
```
|
|
|
|
## Example Output
|
|
|
|
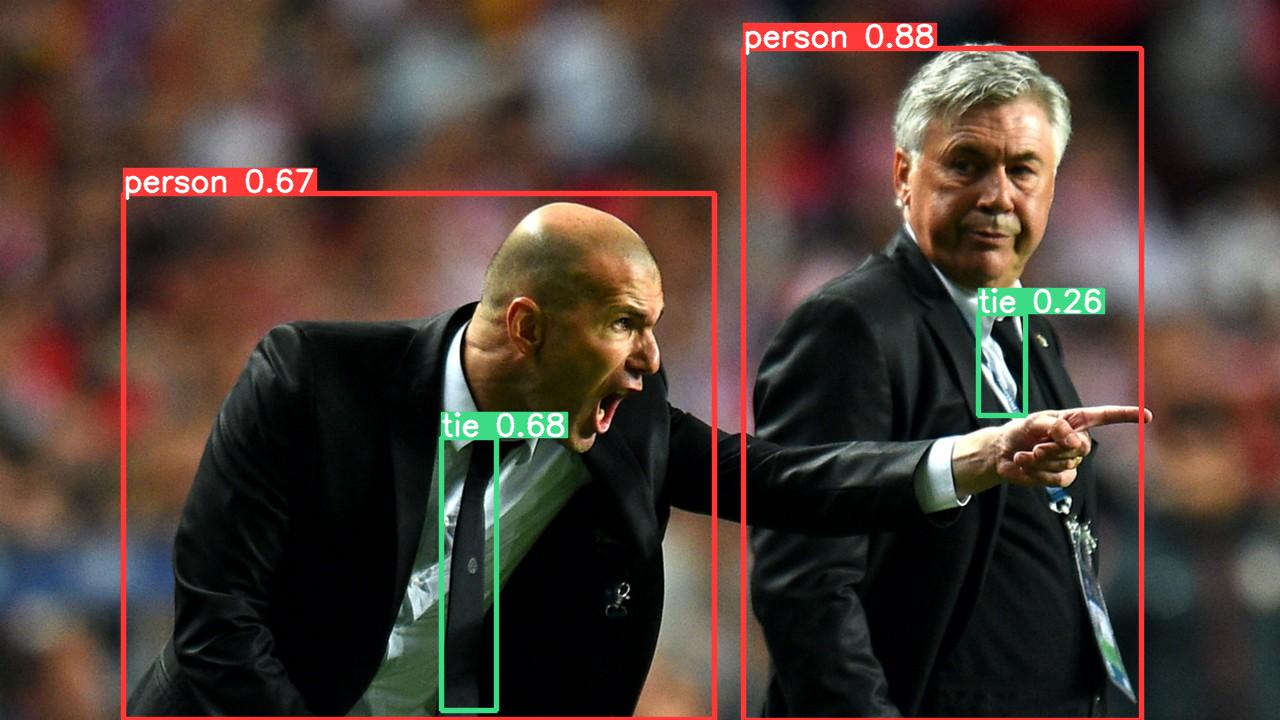
The service processes the image and returns it with bounding boxes around detected objects:
|
|
|
|
|
|
|