 wehub-resource-sync
105 lines
5.8 KiB
Markdown
105 lines
5.8 KiB
Markdown
# Vertex AI Search & Flutter Demo
|
||
|
||
|
||
|
||
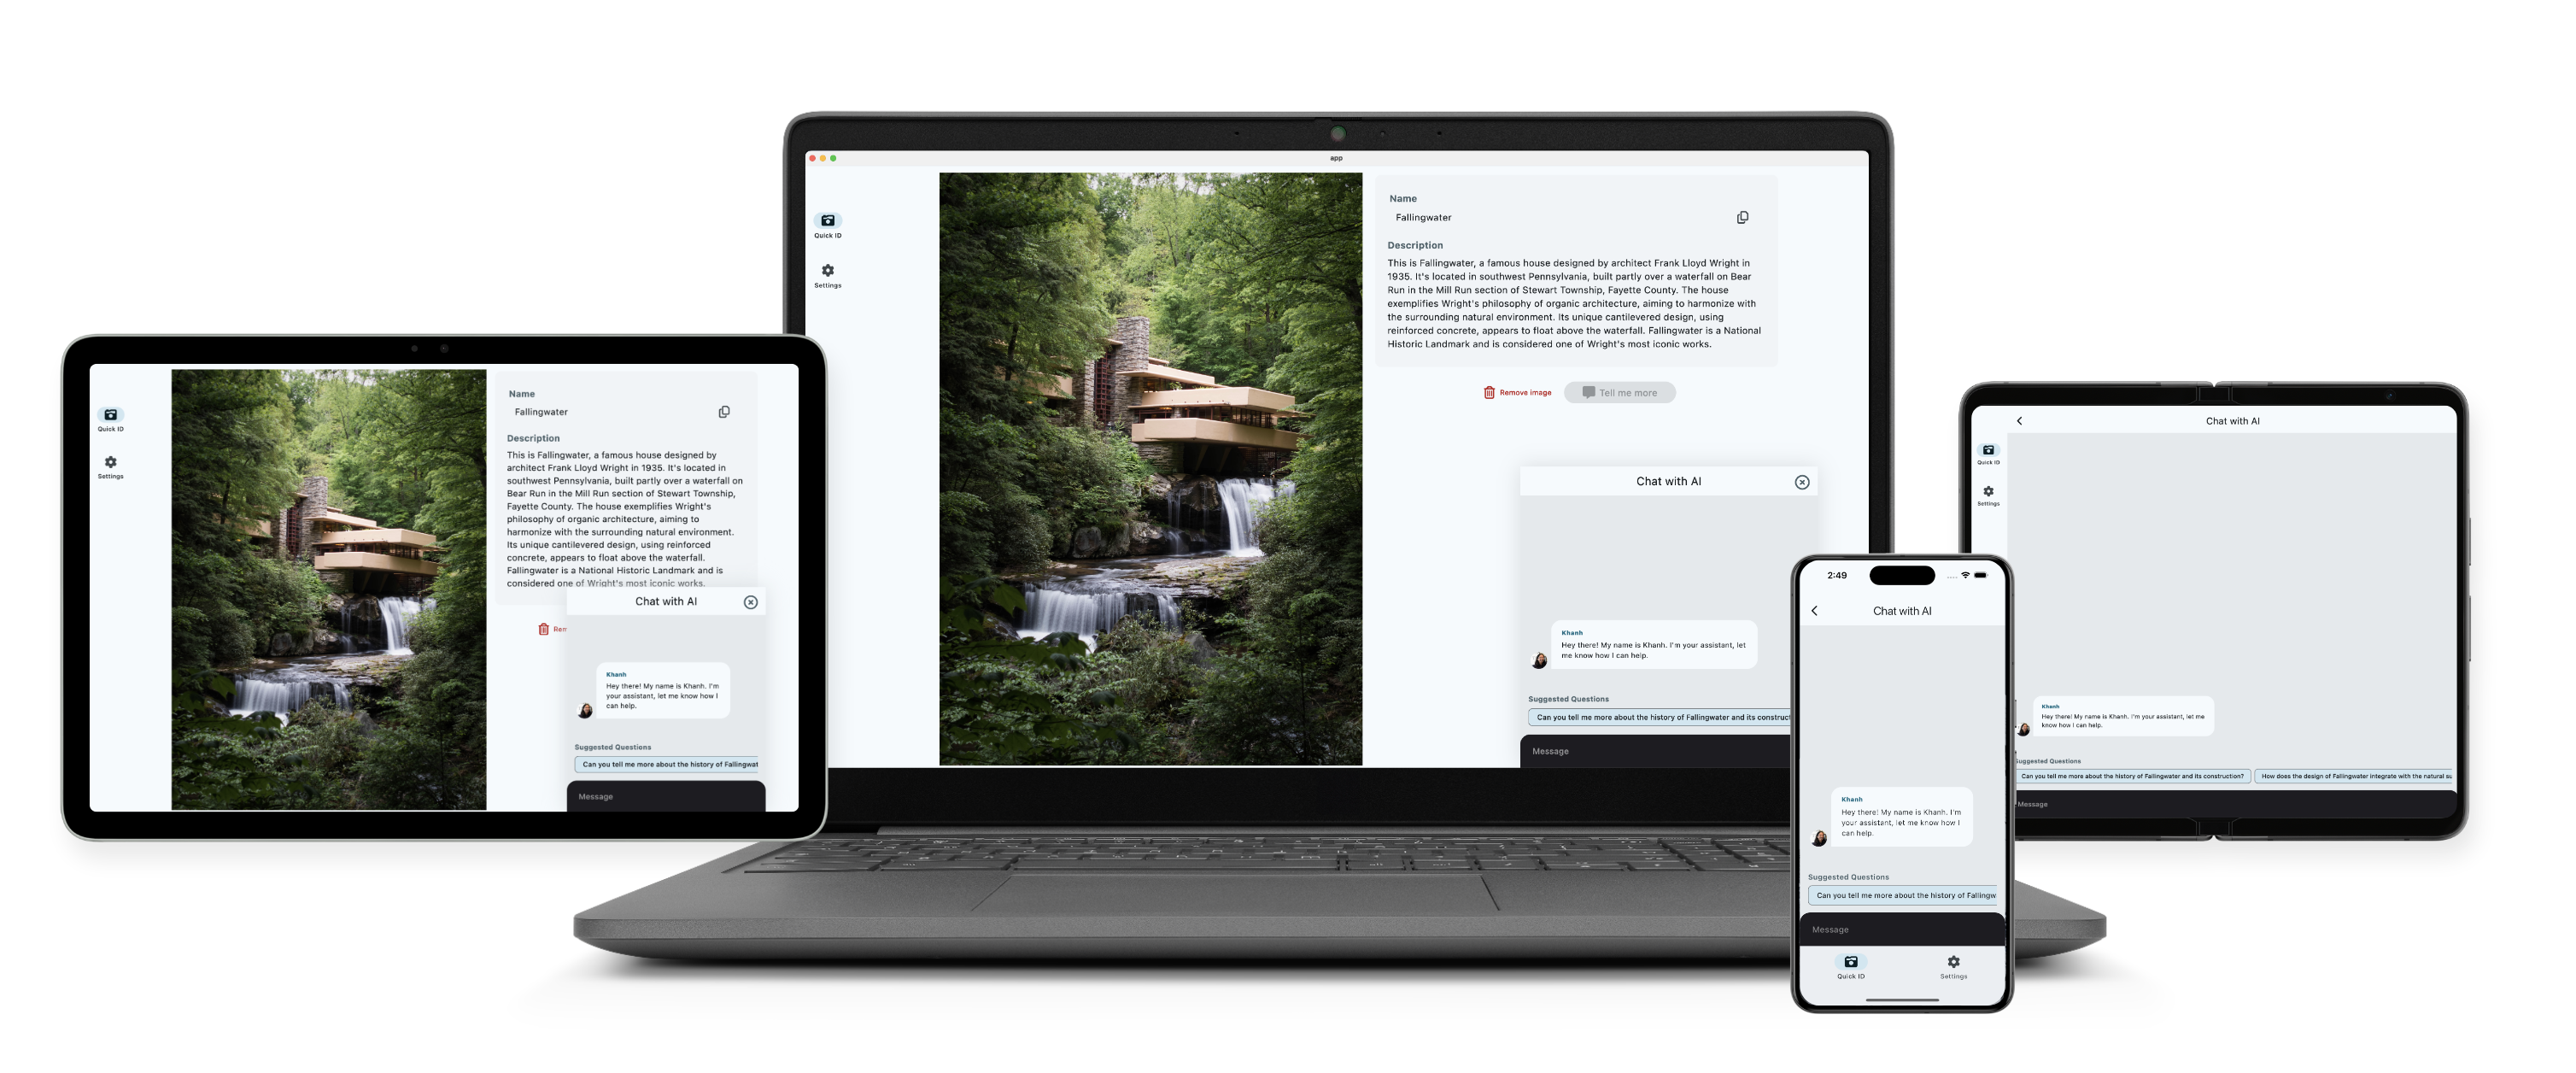
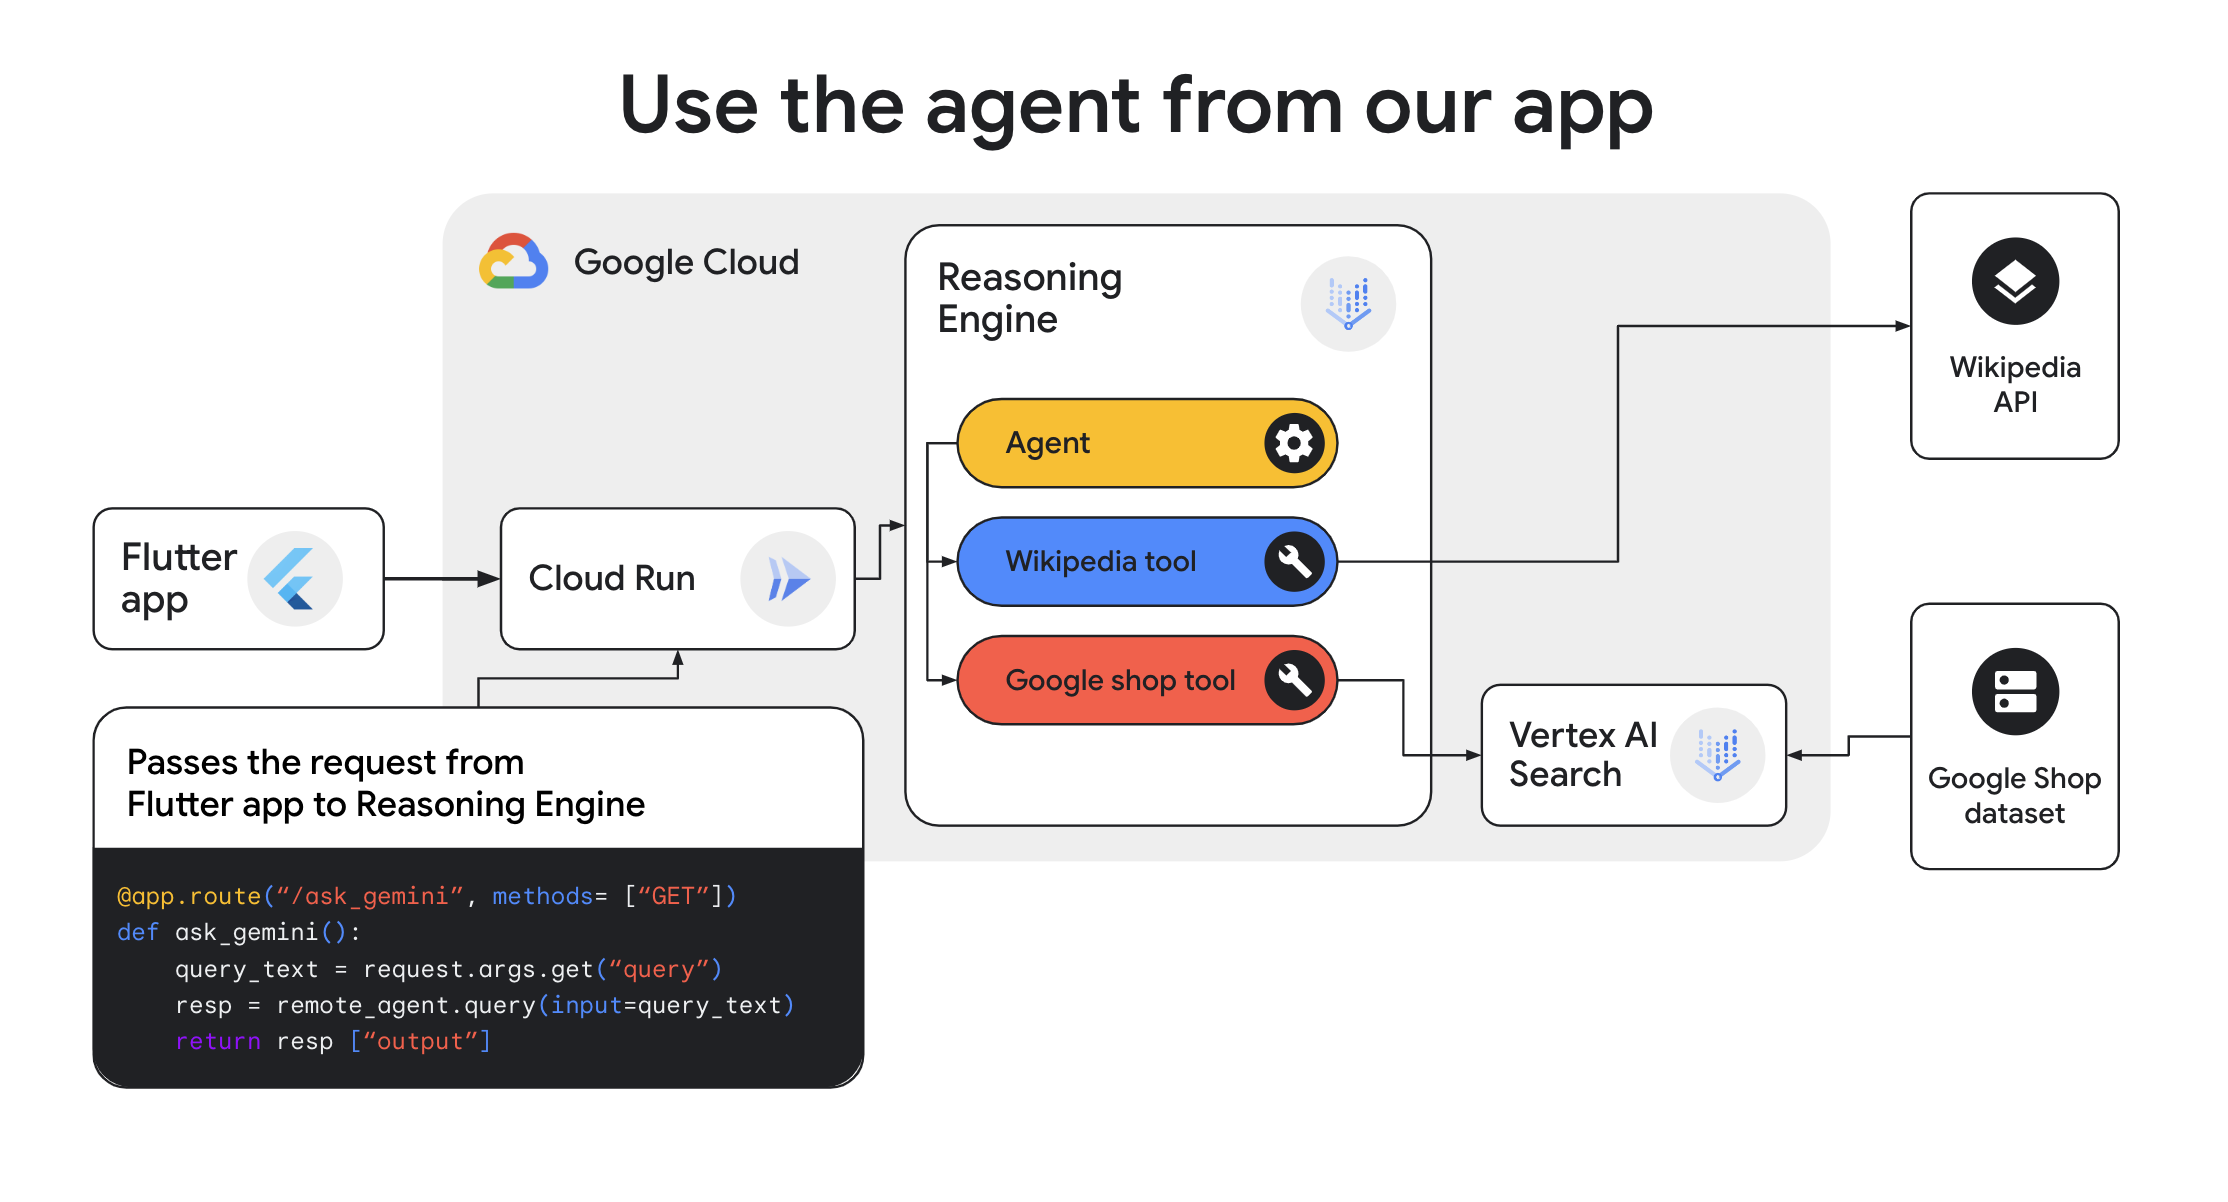
This project is a demo that integrates a Vertex AI Agent with a multi-platform Flutter app. Flutter is used as the client app framework, Vertex AI Search is used as a vector DB, and Reasoning Engine helps us build and deploy an agent with Agent Engine.
|
||
|
||
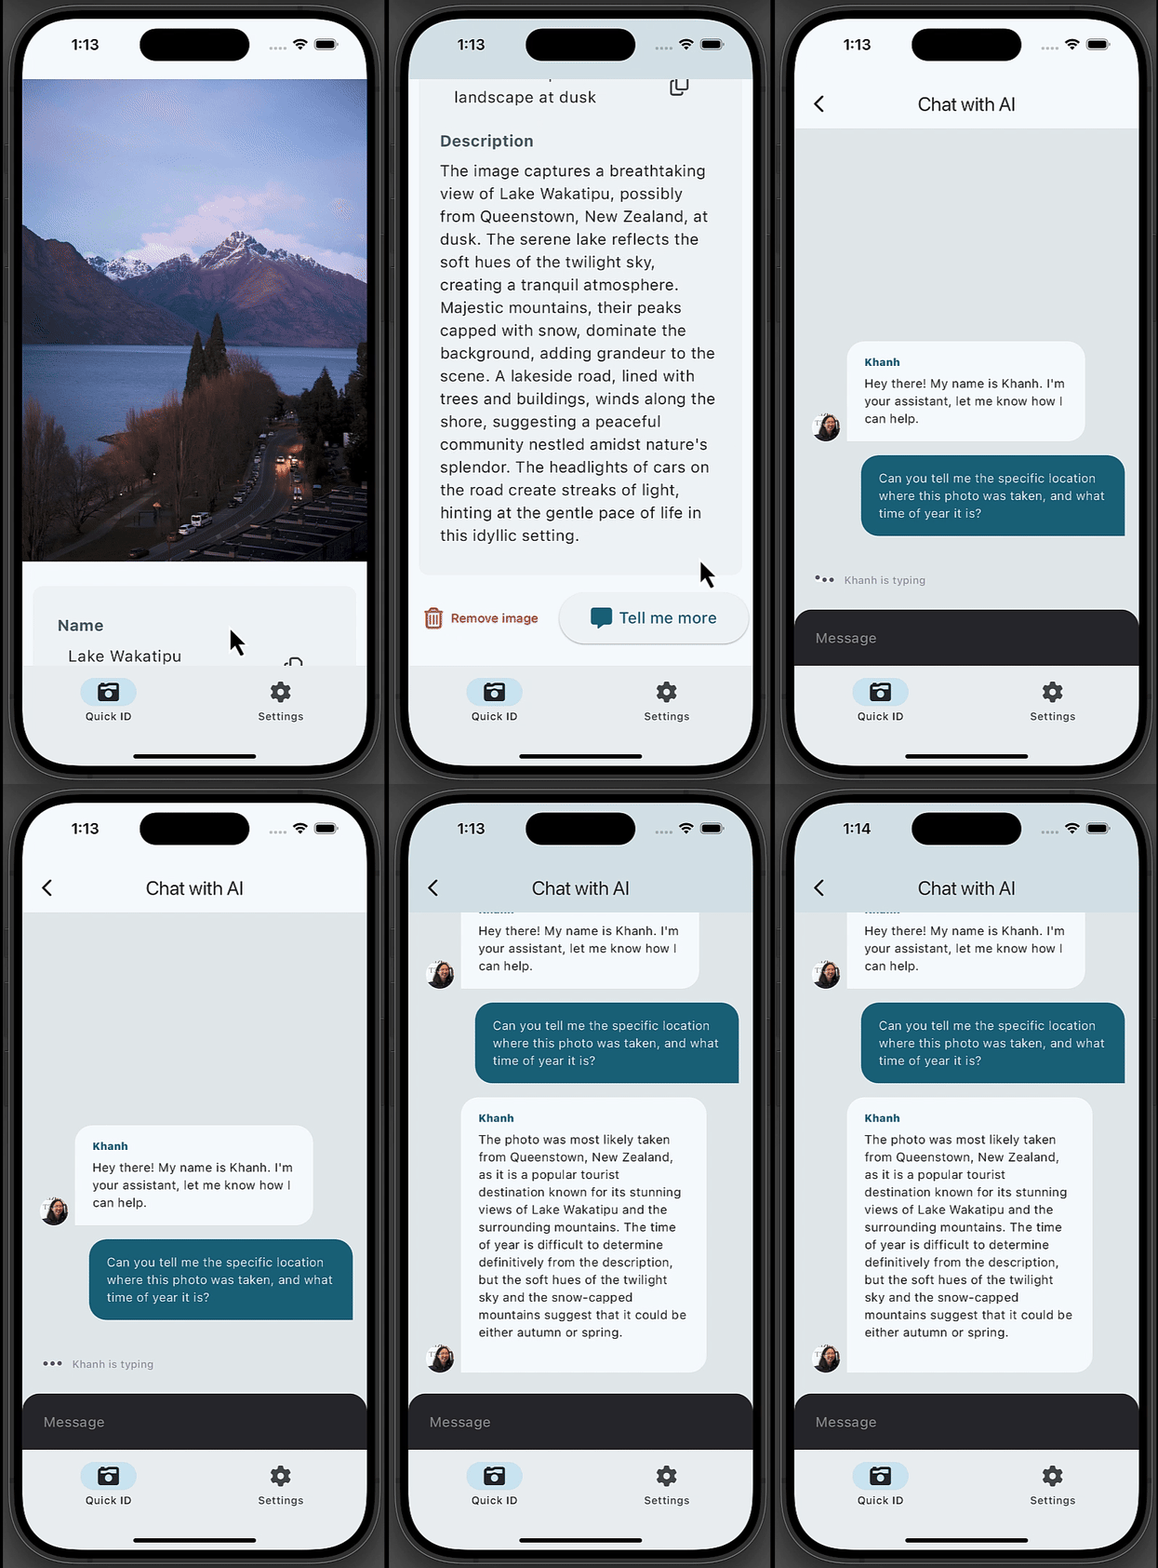
Users can run the Flutter app and take or upload a photo of a landmark. The app identifies the subject name and provides a brief description.
|
||
|
||
To learn more about the subject of the photo, tap "tell me more" to chat with Khanh, an AI agent build built with Vertex AI Search, and ask follow-up questions about the history of subject in the photo based on information Wikipedia.
|
||
|
||
The agent can also identify merchandise from the [Google Merchandise Store](https://your.merch.google/) and provide product name, description, pricing, and purchase link by referencing a Google Merchandise store dataset.
|
||
|
||
> [!NOTE]
|
||
> Check out the Google I/O 2024 talk for a full walkthrough: [Build generative AI agents with Vertex AI Search and Flutter](https://youtu.be/V8P_S9OLI_I?si=N2QMBs7HNZL6mKU0).
|
||
|
||
## Demo
|
||
|
||
[Try the live demo app](https://photo-discovery-demo.web.app/)
|
||
|
||
|
||
|
||
## Getting Started
|
||
|
||
### Preparing Vertex AI Search search app
|
||
|
||
1. Create a search data store on Vertex AI Search.
|
||
|
||
- On the Console of your Google Cloud project, open `Agent Builder` > `Data Stores` > `CREATE DATA STORE` > `Cloud Storage` > `Structured data (JSONL)`.
|
||
- At `Select a folder or file` choose `FILE`, and enter `gcp-samples-ic0-ag/src/google_merch_shop_items.json`. Click `CONTINUE`.
|
||
- At `Review schema` page, click `CONTINUE`.
|
||
- In `Configure your data store` page, choose `Location of your data store` as `us` and enter `Your data store name` as `gms`.
|
||
- Click `CREATE`.
|
||
|
||
1. Check the data store ID. Open `Data Stores` and click `gms`. Make sure the `Number of documents` is 204 items. Take a memo of the `Data store ID`. This will be the search engine ID.
|
||
|
||
1. Create a search app.
|
||
|
||
- On the Console, open `Agent Builder` > `Apps` > `CREATE APP`. Choose `Search`.
|
||
- On `Search app configuration`, opt out `Enterprise edition features` and `Advanced LLM features` options.
|
||
- Enter `Your app name` as `gms_test`, `External name` as your company name, and `Location of your app` as `us`.
|
||
- Click `CONTINUE`. On `Data Stores` page, choose `gms` and click `CREATE`. This will start building a search index with the gms data store which will take about 5 minutes.
|
||
|
||
1. Preview the app. After 5 minutes, open `Preview` and type `Dino` on the search box. You should see the search results with Chrome Dino related items.
|
||
|
||
### Building & deploying the agent with Vertex AI Search
|
||
|
||
1. Deploy a Cloud Run app: Edit `/ag-web/app/app.py` and `/ag-web/app/deploy.sh` and set the project ID, GCS bucket name and the search engine ID. Run `deploy.sh` to deploy the Run app. Open `ag-web` app on the Cloud Run console, and find the hostname (eg `ag-web-xxxxxx.a.run.app`).
|
||
|
||
1. Deploy a Reasoning Engine agent: Open [Cloud Workbench](https://cloud.google.com/vertex-ai/docs/workbench/instances/create-console-quickstart) and upload `/ag-web/ag_setup_re.ipynb`. Open the Notebook and edit the `GOOGLE_SHOP_VERTEXAI_SEARCH_URL` with the Run hostname. Run the Notebook from the start to deploy the agent to the Reasoning Engine runtime. From the output on the deployment, find the reasoning engine ID. The output format is `projects/PROJECT_ID/locations/LOCATION/reasoningEngines/REASONING_ENGINE_ID`.
|
||
|
||
1. Redeploy the Cloud Run app: Edit `/ag-web/app/app.py` and set the `REASONING_ENGINE_ID`. Run `/ag-web/app/deploy.sh` to redeploy it.
|
||
|
||
### Running the Flutter App
|
||
|
||
1. Ensure that you have [Flutter set up](https://flutter.dev/get-started) on your machine.
|
||
1. Flutter enables building multiplaform apps, so this app has been built to be run on iOS, Android, web, and desktop. Make sure to install any preferred target platform (aka where you want to run the app) requirements such as the iOS Simulator, Android Emulator, an Android phone, Chrome browser, etc.)
|
||
|
||
1. Change directory into the Flutter project using `cd app`
|
||
|
||
1. Set up a Firebase project and connect it to this Flutter app by following [step 1 in these instructions.](https://firebase.google.com/docs/vertex-ai/get-started?platform=flutter) Only complete Step 1! Don't add the Vertex AI for Firebase Dart SDK because this source code already adds it as a dependency.
|
||
|
||
1. Update the variable CloudRunHost in `app/lib/config.dart` with your Cloud Run endpoint host.
|
||
|
||
1. On the terminal, run `flutter pub get` to get all project dependencies.
|
||
|
||
1. Run the app using `flutter run -d <device-id>` where `<device-id>` is the ID for an available device.
|
||
|
||
> [!TIP]
|
||
> Get available devices by running `flutter devices` ex: `AA8A7357`, `macos`, `chrome`.
|
||
|
||
### Using the app
|
||
|
||
1. Once the app is running, select an image for analysis. Once the image subject has been identified click the "tell me more" button to start an Agent chat session.
|
||
|
||
1. [Optional] Running the app on a mobile device with a camera? You can enable the feature for taking photos directly within the app. In `lib/functionality/adaptive/capabilities.dart` set `Capabilities.hasCamera` to `true` like so:
|
||
|
||
#### Before
|
||
|
||
```dart
|
||
static bool get hasCamera {
|
||
return false;
|
||
}
|
||
```
|
||
|
||
#### After
|
||
|
||
```dart
|
||
static bool get hasCamera {
|
||
return true;
|
||
}
|
||
```
|
||
|
||
## Tech stack
|
||
|
||
- Vertex AI Search
|
||
- Flutter
|
||
- Cloud Run
|
||
- Vertex AI for Firebase Dart SDK
|
||
|
||
## App Architecture
|
||
|
||
|
||
|
||
Made with ❤️ by [Kaz Sato](https://github.com/kazunori279) & [Khanh Nguyen](https://github.com/khanhnwin)
|