> [!NOTE] > 本文档由 WeHub 基于上游 README 翻译整理,属于社区翻译,非官方中文文档。 > [English](./README.en.md) · [原始项目](https://github.com/HKUDS/AutoAgent) · [上游 README](https://github.com/HKUDS/AutoAgent/blob/HEAD/README.md) > 原作者、版权与许可证归属以原始项目及本仓库 LICENSE 文件为准。
Logo

AutoAgent:全自动化 & 零代码
LLM Agent 框架

致谢 加入我们的 Slack 社区 加入我们的 Discord 社区
查看文档 论文 评测基准分数
HKUDS%2FAutoAgent | Trendshift
欢迎使用 AutoAgent!AutoAgent 是一个**全自动化(Fully-Automated)**且高度**自演进(Self-Developing)**的框架,让用户仅凭**自然语言**即可创建并部署 LLM Agent。 ## ✨ AutoAgent 核心特性 * 💬 **自然语言驱动的 Agent 构建**
纯粹通过自然对话即可自动构建并编排协作式 Agent 系统,无需手动编码或技术配置。 * 🚀 **零代码框架(Zero-Code Framework)**
让任何人——无论是否具备编程经验——都能仅凭自然语言创建并定制自己的 Agent、工具与工作流,从而普及 AI 开发。 * ⚡ **自管理工作流生成**
根据高层任务描述动态创建、优化并适配 Agent 工作流,即使用户无法完整说明实现细节也能胜任。 * 🔧 **智能资源编排**
通过迭代式自我改进实现可控的代码生成,用于创建工具、Agent 与工作流,同时支持单 Agent 创建与多 Agent 工作流生成。 * 🎯 **自对弈 Agent 定制(Self-Play Agent Customization)**
通过迭代式自我改进实现可控的代码生成,用于创建工具、Agent 与工作流,同时支持单 Agent 创建与多 Agent 工作流生成。 🚀 解锁 LLM Agent 的未来。立即体验 🔥AutoAgent🔥!
Logo
AutoAgent 快速概览。
## 🔥 动态
## 📑 目录 * ✨ 特性 * 🔥 动态 * 🔍 如何使用 AutoAgent * 1. `user mode`(深度研究 Agent) * 2. `agent editor`(无工作流的 Agent 创建) * 3. `workflow editor`(带工作流的 Agent 创建) * ⚡ 快速开始 * 安装 * API 密钥配置 * 以 CLI 模式启动 * ☑️ 待办列表 * 🔬 如何复现论文中的结果 * 📖 文档 * 🤝 加入社区 * 🙏 致谢 * 🌟 引用 ## 🔍 如何使用 AutoAgent ### 1. `user mode`(深度研究 Agent) AutoAgent 在起始页的用户模式中提供一套开箱即用的多 Agent 系统。该系统作为全面的 AI 研究助手,适用于信息检索、复杂分析任务以及综合报告生成。 - 🚀 **高性能**:使用 Claude 3.5 即可达到 Deep Research 的水平,而非 OpenAI 的 o3 模型。 - 🔄 **模型灵活性**:兼容任意 LLM(包括 Deepseek-R1、Grok、Gemini 等) - 💰 **高性价比**:作为 Deep Research 每月 $200 订阅的开源替代方案 - 🎯 **用户友好**:易于部署的 CLI 界面,交互顺畅 - 📁 **文件支持**:支持文件上传,增强数据交互

🎥 Deep Research(即 User Mode)

### 2. `agent editor`(无工作流的 Agent 创建) AutoAgent 最鲜明的特性是其自然语言定制能力。与其他 Agent 框架不同,AutoAgent 让你仅凭自然语言即可创建工具、Agent 与工作流。只需选择 `agent editor` 或 `workflow editor` 模式,即可通过对话开启 Agent 构建之旅。 你可以如下方图示使用 `agent editor`。
requirement
输入你想创建的 Agent 类型。
profiling
自动化 Agent 画像分析。
profiles
输出 Agent 画像。
tools
创建所需工具。
task
输入你希望用 Agent 完成的任务。(可选)
output
创建所需 Agent 并进入下一步。
### 3. `workflow editor`(通过工作流创建 Agent) 你也可以使用 `workflow editor` 模式,通过自然语言描述来创建 Agent 工作流,如下图所示。(提示:该模式暂不支持工具创建。)
requirement
输入你想要创建的工作流类型。
profiling
自动化工作流画像分析。
profiles
输出工作流画像。
task
输入你想通过该工作流完成的任务。(可选)
output
创建所需的工作流并进入下一步。
## ⚡ 快速开始 ### 安装 #### AutoAgent 安装 ```bash git clone https://github.com/HKUDS/AutoAgent.git cd AutoAgent pip install -e . ``` #### Docker 安装 我们使用 Docker 将 Agent 交互环境容器化。因此请先安装 [Docker](https://www.docker.com/)。你无需手动拉取预构建镜像,因为我们已让 Auto-Deep-Research **根据你的机器架构自动拉取对应的预构建镜像**。 ### API 密钥配置 创建环境变量文件,就像 `.env.template` 一样,并为你想要使用的 LLM 设置 API 密钥。并非每个 LLM API 密钥都必须填写,按需使用即可。 ```bash # Required Github Tokens of your own GITHUB_AI_TOKEN= # Optional API Keys OPENAI_API_KEY= DEEPSEEK_API_KEY= ANTHROPIC_API_KEY= GEMINI_API_KEY= HUGGINGFACE_API_KEY= GROQ_API_KEY= XAI_API_KEY= ``` ### 以 CLI 模式启动 > [🚨 **最新消息**:] 我们已更新更易用的命令来启动 CLI 模式,并修复了 issues 中不同 LLM 提供商的相关 bug。你可以按照以下步骤,用更少的配置在不同 LLM 提供商下启动 CLI 模式。 #### 命令选项: 你可以运行 `auto main` 来启动 AutoAgent 的完整功能,包括 `user mode`、`agent editor` 和 `workflow editor`。顺便一提,你也可以运行 `auto deep-research` 来启动更轻量的 `user mode`,类似于 [Auto-Deep-Research](https://github.com/HKUDS/Auto-Deep-Research) 项目。该命令的部分配置如下所示。 - `--container_name`:Docker 容器名称(默认:'deepresearch') - `--port`:容器端口(默认:12346) - `COMPLETION_MODEL`:指定要使用的 LLM 模型,模型名称应遵循 [Litellm](https://github.com/BerriAI/litellm) 的命名规范。(默认:`claude-3-5-sonnet-20241022`) - `DEBUG`:启用调试模式以输出详细日志(默认:False) - `API_BASE_URL`:LLM 提供商的基础 URL(默认:None) - `FN_CALL`:启用 function calling(默认:None)。大多数情况下你可以忽略此选项,因为我们已根据模型名称设置了默认值。 - `git_clone`:将 AutoAgent 仓库克隆到本地环境(仅支持 `auto main` 命令,默认:True) - `test_pull_name`:测试拉取的分支名称。(仅支持 `auto main` 命令,默认:'autoagent_mirror') #### 关于 `git_clone` 和 `test_pull_name` 的更多说明] 在 `agent editor` 和 `workflow editor` 模式下,我们需要将 AutoAgent 仓库的镜像克隆到本地 Agent 交互环境,并让 **AutoAgent** 自动更新 AutoAgent 自身,例如创建新工具、Agent 和工作流。因此,如果你想使用 `agent editor` 和 `workflow editor` 模式,应将 `git_clone` 设为 True,并将 `test_pull_name` 设为 'autoagent_mirror' 或其他分支。 #### 搭配不同 LLM 提供商使用 `auto main` 接下来我将演示如何通过 `auto main` 命令搭配不同 LLM 提供商使用 AutoAgent 的完整功能。如果你想使用 `auto deep-research` 命令,可参考 [Auto-Deep-Research](https://github.com/HKUDS/Auto-Deep-Research) 项目了解更多详情。 ##### Anthropic * 在 `.env` 文件中设置 `ANTHROPIC_API_KEY`。 ```bash ANTHROPIC_API_KEY=your_anthropic_api_key ``` * 运行以下命令启动 Auto-Deep-Research。 ```bash auto main # default model is claude-3-5-sonnet-20241022 ``` ##### OpenAI * 在 `.env` 文件中设置 `OPENAI_API_KEY`。 ```bash OPENAI_API_KEY=your_openai_api_key ``` * 运行以下命令启动 Auto-Deep-Research。 ```bash COMPLETION_MODEL=gpt-4o auto main ``` ##### Mistral * 在 `.env` 文件中设置 `MISTRAL_API_KEY`。 ```bash MISTRAL_API_KEY=your_mistral_api_key ``` * 运行以下命令启动 Auto-Deep-Research。 ```bash COMPLETION_MODEL=mistral/mistral-large-2407 auto main ``` ##### Gemini - Google AI Studio * 在 `.env` 文件中设置 `GEMINI_API_KEY`。 ```bash GEMINI_API_KEY=your_gemini_api_key ``` * 运行以下命令启动 Auto-Deep-Research。 ```bash COMPLETION_MODEL=gemini/gemini-2.0-flash auto main ``` ##### Huggingface * 在 `.env` 文件中设置 `HUGGINGFACE_API_KEY`。 ```bash HUGGINGFACE_API_KEY=your_huggingface_api_key ``` * 运行以下命令启动 Auto-Deep-Research。 ```bash COMPLETION_MODEL=huggingface/meta-llama/Llama-3.3-70B-Instruct auto main ``` ##### Groq * 在 `.env` 文件中设置 `GROQ_API_KEY`。 ```bash GROQ_API_KEY=your_groq_api_key ``` * 运行以下命令启动 Auto-Deep-Research。 ```bash COMPLETION_MODEL=groq/deepseek-r1-distill-llama-70b auto main ``` ##### OpenAI 兼容端点(例如 Grok) * 在 `.env` 文件中设置 `OPENAI_API_KEY`。 ```bash OPENAI_API_KEY=your_api_key_for_openai_compatible_endpoints ``` * 运行以下命令启动 Auto-Deep-Research。 ```bash COMPLETION_MODEL=openai/grok-2-latest API_BASE_URL=https://api.x.ai/v1 auto main ``` ##### OpenRouter(例如 DeepSeek-R1) 我们暂时建议使用 OpenRouter 作为 DeepSeek-R1 的 LLM 提供商,因为 DeepSeek-R1 的官方 API 目前无法高效使用。 * 在 `.env` 文件中设置 `OPENROUTER_API_KEY`。 ```bash OPENROUTER_API_KEY=your_openrouter_api_key ``` * 运行以下命令启动 Auto-Deep-Research。 ```bash COMPLETION_MODEL=openrouter/deepseek/deepseek-r1 auto main ``` ##### DeepSeek * 在 `.env` 文件中设置 `DEEPSEEK_API_KEY`。 ```bash DEEPSEEK_API_KEY=your_deepseek_api_key ``` * 运行以下命令启动 Auto-Deep-Research。 ```bash COMPLETION_MODEL=deepseek/deepseek-chat auto main ``` CLI 模式启动后,你将看到 AutoAgent 的启动页面:
Logo
AutoAgent 启动页面。
### 提示 #### 将浏览器 Cookie 导入浏览器环境 你可以将浏览器 Cookie 导入浏览器环境,以便 Agent 更好地访问某些特定网站。更多详情,请参阅 [cookies](./AutoAgent/environment/cookie_json/README.md) 文件夹。 #### 为第三方工具平台添加你自己的 API 密钥 如果你想从第三方工具平台(例如 RapidAPI)创建工具,需要先在平台上订阅相关工具,然后通过运行 [process_tool_docs.py](./process_tool_docs.py) 添加你自己的 API 密钥。 ```bash python process_tool_docs.py ``` 更多功能即将推出!🚀 **Web GUI 界面**正在开发中。 ## ☑️ 待办清单 AutoAgent 正在持续演进!以下是即将推出的内容: - 📊 **更多基准测试**:将评估范围扩展到 **SWE-bench**、**WebArena** 等 - 🖥️ **GUI Agent**:支持具备 GUI 交互的 *Computer-Use* 智能体 - 🔧 **工具平台**:与 **Composio** 等更多平台集成 - 🏗️ **代码沙箱**:支持 **E2B** 等更多环境 - 🎨 **Web 界面**:开发完善的 GUI,以提升用户体验 有想法或建议?欢迎提交 issue!敬请期待更多精彩更新!🚀 ## 🔬 如何复现论文中的结果 ### GAIA Benchmark 对于 GAIA 基准测试,你可以运行以下命令进行推理。 ```bash cd path/to/AutoAgent && sh evaluation/gaia/scripts/run_infer.sh ``` 进行评估时,你可以运行以下命令。 ```bash cd path/to/AutoAgent && python evaluation/gaia/get_score.py ``` ### Agentic-RAG 对于 Agentic-RAG 任务,你可以运行以下命令进行推理。 Step1. 前往[此页面](https://huggingface.co/datasets/yixuantt/MultiHopRAG) 并下载。将其保存到你的数据路径。 Step2. 运行以下命令进行推理。 ```bash cd path/to/AutoAgent && sh evaluation/multihoprag/scripts/run_rag.sh ``` Step3. 结果将保存在 `evaluation/multihoprag/result.json` 中。 ## 📖 文档 更详细的文档即将推出 🚀,我们将在 [Documentation](https://AutoAgent-ai.github.io/docs) 页面持续更新。 ## 🤝 加入社区 我们希望为 AutoAgent 建立一个社区,欢迎所有人加入我们。你可以通过以下方式加入我们的社区: - [加入我们的 Slack 工作区](https://join.slack.com/t/AutoAgent-workspace/shared_invite/zt-2zibtmutw-v7xOJObBf9jE2w3x7nctFQ) - 在这里我们讨论研究、架构和未来开发。 - [加入我们的 Discord 服务器](https://discord.gg/z68KRvwB) - 这是一个由社区运营的服务器,用于一般讨论、提问和反馈。 - [阅读或提交 Github Issues](https://github.com/HKUDS/AutoAgent/issues) - 查看我们正在处理的 issue,或提出你自己的想法。 ## 其他
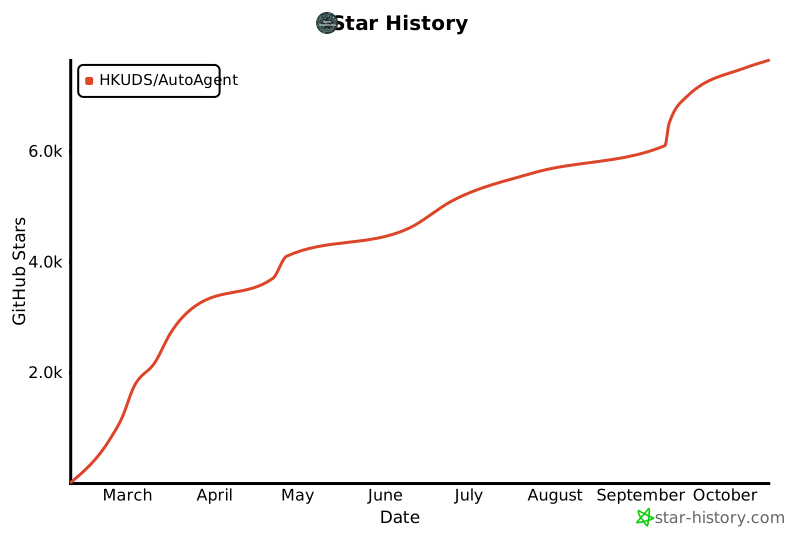
[![Stargazers repo roster for @HKUDS/AutoAgent](https://reporoster.com/stars/HKUDS/AutoAgent)](https://github.com/HKUDS/AutoAgent/stargazers) [![Forkers repo roster for @HKUDS/AutoAgent](https://reporoster.com/forks/HKUDS/AutoAgent)](https://github.com/HKUDS/AutoAgent/network/members) [![Star History Chart](https://api.star-history.com/svg?repos=HKUDS/AutoAgent&type=Date)](https://star-history.com/#HKUDS/AutoAgent&Date)
## 🙏 致谢 罗马非一日建成。AutoAgent 站在巨人的肩膀上,我们对前人的杰出工作深表感激。我们的框架架构借鉴了 [OpenAI Swarm](https://github.com/openai/swarm),,而用户模式下的三智能体设计则受益于 [Magentic-one](https://github.com/microsoft/autogen/tree/main/python/packages/autogen-magentic-one)'s 的见解。我们还从 [OpenHands](https://github.com/All-Hands-AI/OpenHands) 学习了文档结构,并从许多其他优秀项目中学习了智能体-环境交互设计等。我们对所有这些在塑造 AutoAgent 过程中发挥重要作用的开拓性工作致以诚挚的感谢与敬意。 ## 🌟 引用 ```tex @misc{AutoAgent, title={{AutoAgent: A Fully-Automated and Zero-Code Framework for LLM Agents}}, author={Jiabin Tang, Tianyu Fan, Chao Huang}, year={2025}, eprint={202502.05957}, archivePrefix={arXiv}, primaryClass={cs.AI}, url={https://arxiv.org/abs/2502.05957}, } ```






