 wehub-resource-sync
ADK Multi-Agent MCP Client Application
Overview
This document describes a web application demonstrating the integration of Google Agent Development Kit (ADK) for multi-agent orchestration with Model Context Protocol (MCP) clients. The application features a root agent coordinating tasks between specialized agents that interact with various MCP servers to fulfill user requests.
Architecture
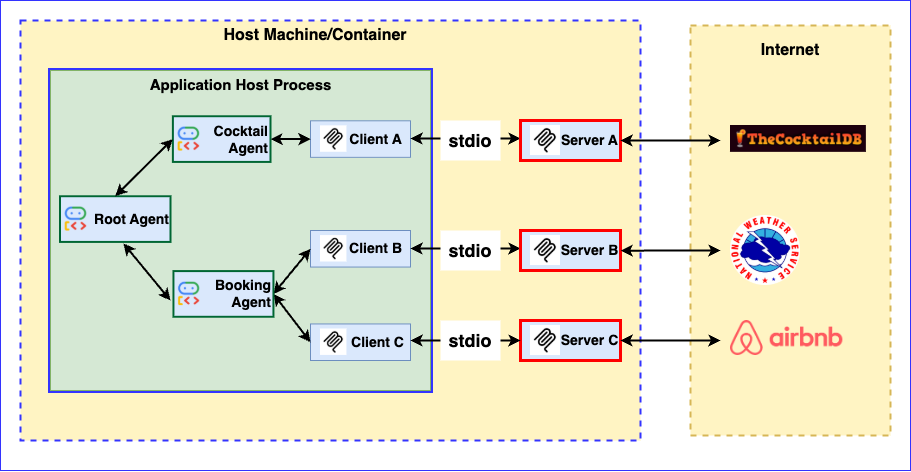
The application utilizes a multi-agent architecture where a root agent delegates tasks to specialized agents (Cocktail and Booking) based on the user's query. These agents then interact with corresponding MCP servers.
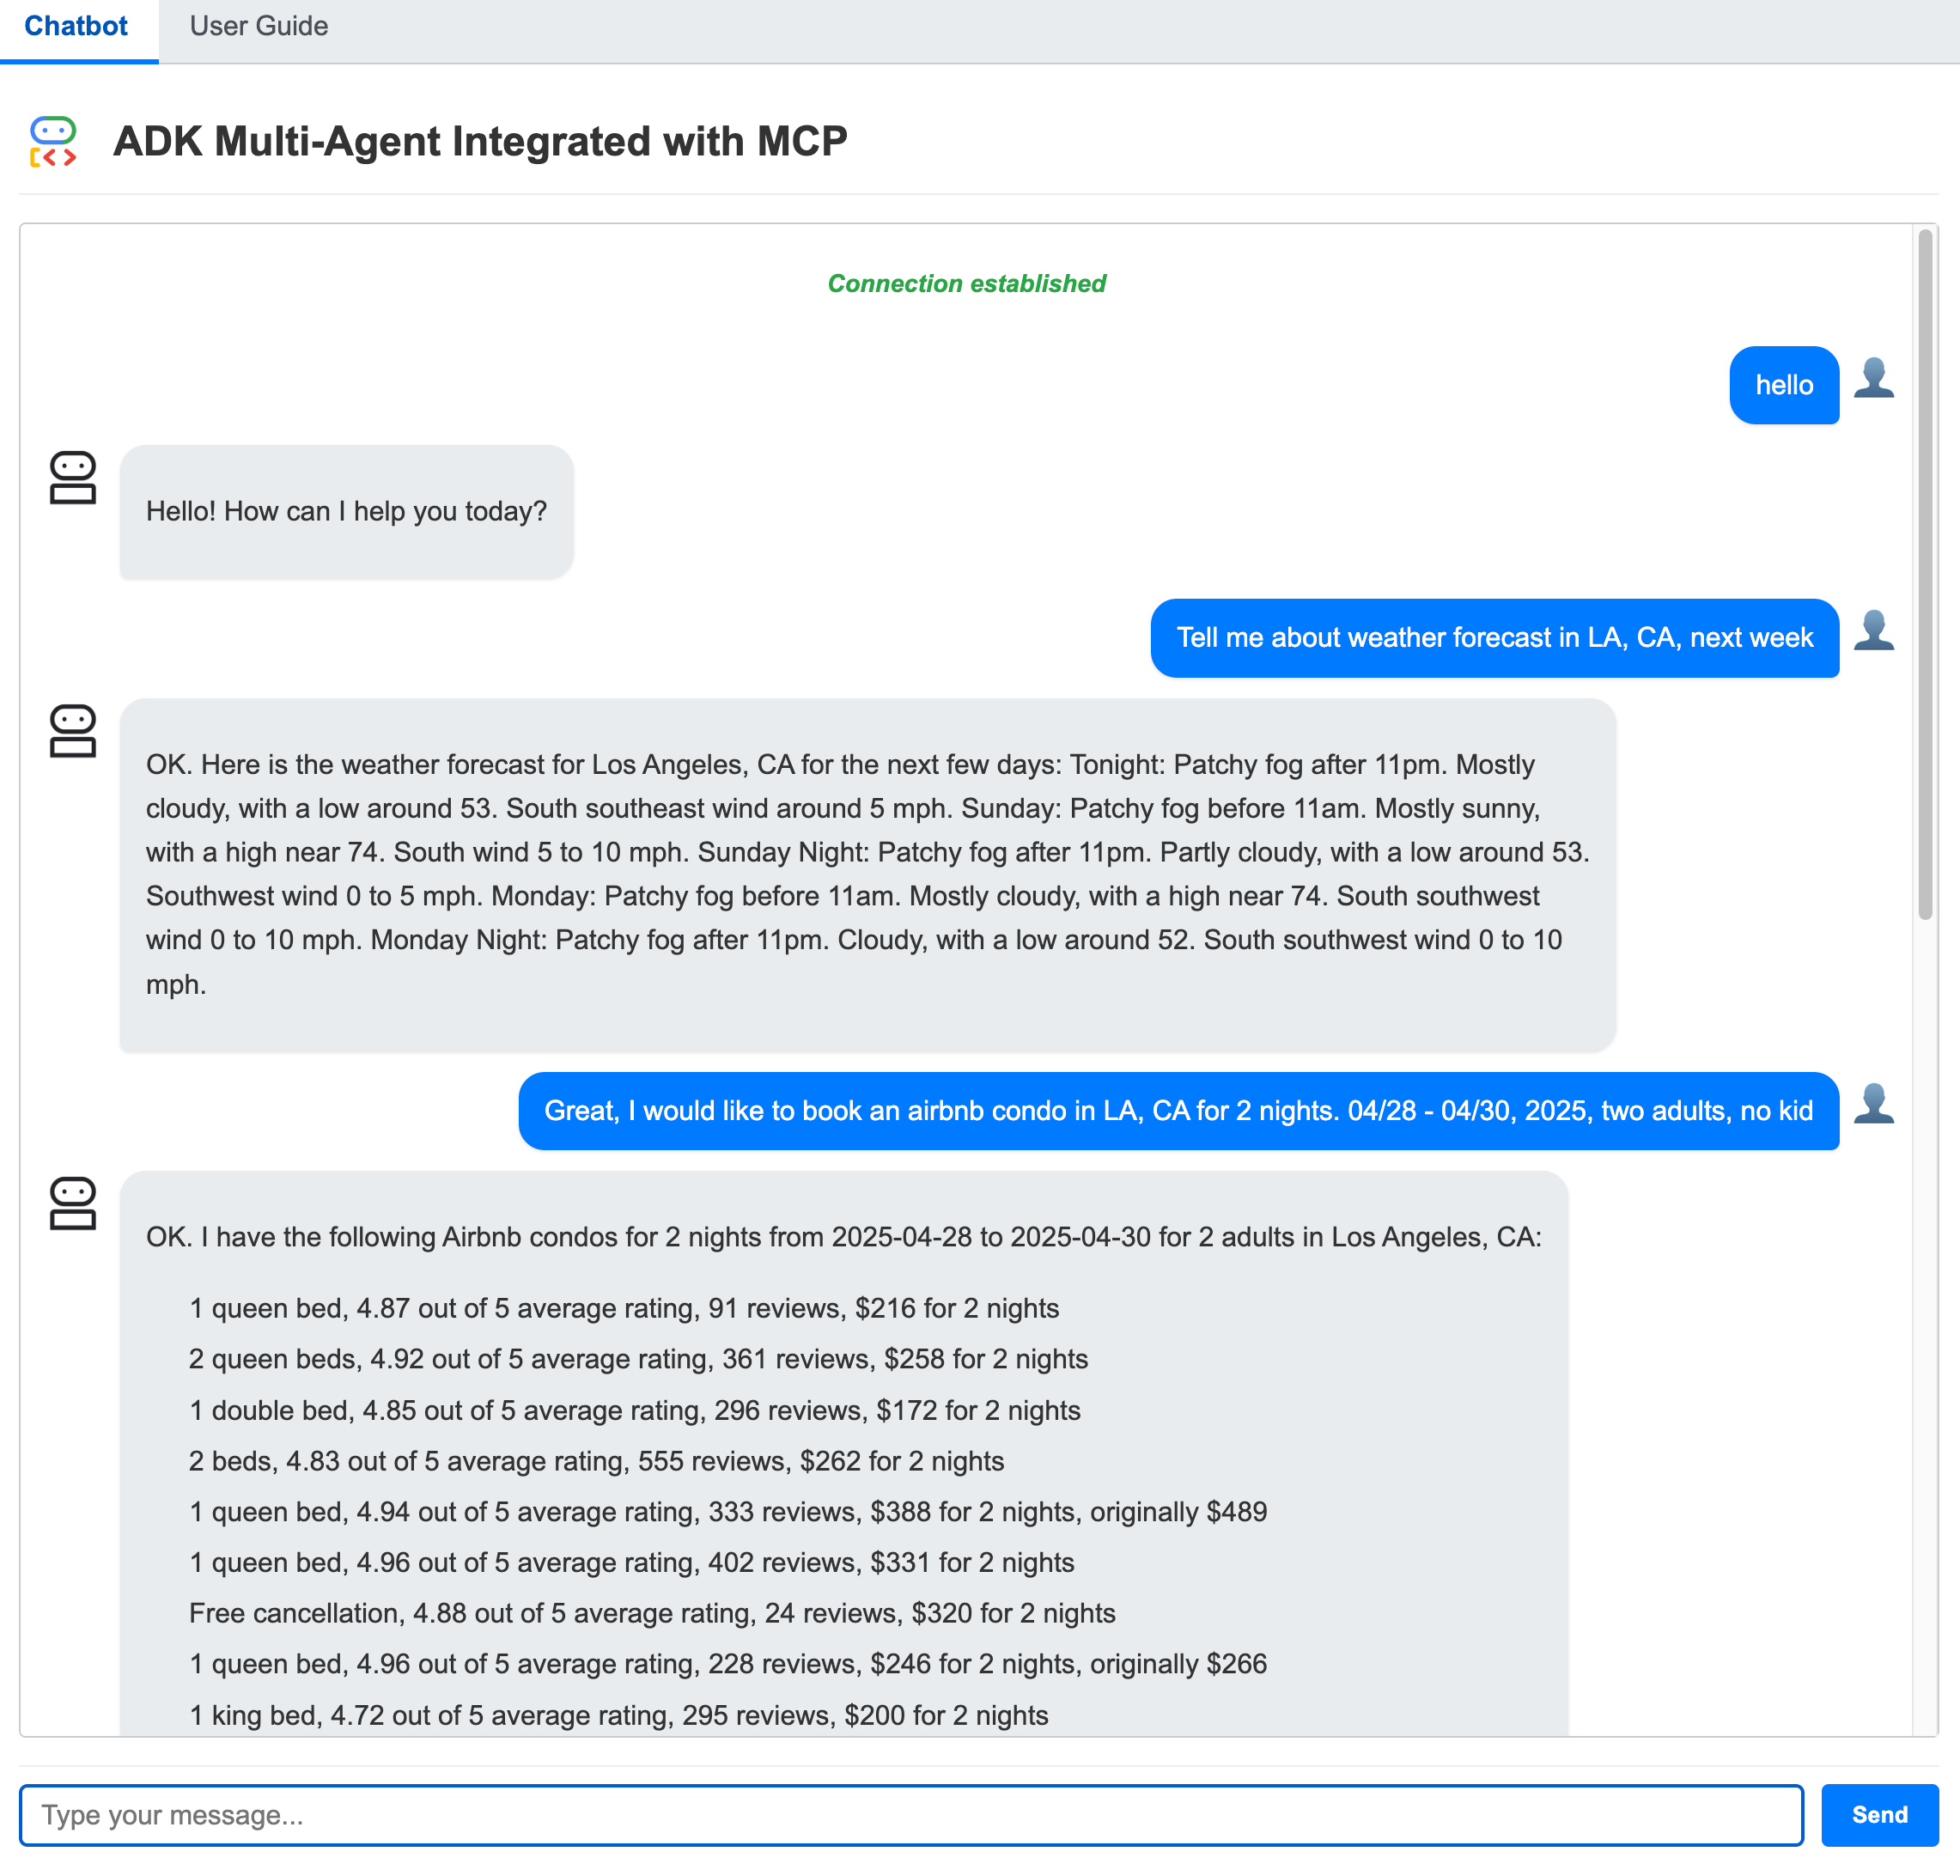
Application Screenshot
Core Components
Agents
The application employs three distinct agents:
- Root Agent: The main entry point that receives user queries, determines the required task(s), and delegates to the appropriate specialized agent(s).
- Cocktail Agent: Handles requests related to cocktail recipes and ingredients by interacting with the Cocktail MCP server.
- Booking Agent: Manages requests related to weather forecasts and Airbnb bookings by interacting with the Weather and Airbnb MCP servers.
MCP Servers and Tools
The agents interact with the following MCP servers:
- Cocktail MCP Server (Local Code)
- Provides 5 tools:
search cocktail by namelist all cocktail by first lettersearch ingredient by namelist random cocktailslookup full cocktail details by id
- Provides 5 tools:
- Weather MCP Server (Local Code)
- Provides 3 tools:
get weather forecast by city nameget weather forecast by coordinatesget weather alert by state code
- Provides 3 tools:
- Airbnb MCP Server (Public GitHub repository - Requires separate setup)
- Provides 2 tools:
search for Airbnb listingsget detailed information about a specific Airbnb listing
- Provides 2 tools:
Example Usage
Here are some example questions you can ask the chatbot:
Please get cocktail margarita id and then full detail of cocktail margaritaPlease list a random cocktailPlease get weather forecast for New YorkPlease get weather forecast for 40.7128,-74.0060I would like to know information about an Airbnb condo in LA, CA for 2 nights. 04/28 - 04/30, 2025, two adults, no kid
Setup and Deployment
Prerequisites
Before running the application locally, ensure you have the following installed:
- Node.js: Required to run the Airbnb MCP server (if testing its functionality locally).
- uv: The Python package management tool used in this project. Follow the installation guide: https://docs.astral.sh/uv/getting-started/installation/
Running Locally
Follow these steps to run the FastAPI application on your local machine.
1. Project Structure
Ensure your project follows this structure:
Your_project_folder/
└── adk_multiagent_mcp_app/  # App folder
├── Dockerfile
├── main.py
├── .dockerignore        # Specifies files/dirs to ignore when building Docker image
├── .python-version      # Specifies Python version (e.g., 3.12)
├── .env                 # Environment variables (create based on template below)
├── mcp_server/
│   ├── cocktail.py      # Local Cocktail MCP server implementation
│   └── weather_server.py # Local Weather MCP server implementation
├── pyproject.toml       # Project dependencies and metadata
├── README.md            # This file
├── static/
│   ├── index.html
│   └── user_guide.md
└── uv.lock              # Lock file for reproducible dependencies
2. Configure Environment Variables
Create a .env file in the adk_multiagent_mcp_app directory with the following content. Replace placeholders with your actual values.
# Choose Model Backend: 0 -> ML Dev, 1 -> Vertex AI
GOOGLE_GENAI_USE_VERTEXAI=1

# --- ML Dev Backend Configuration (if GOOGLE_GENAI_USE_VERTEXAI=0) ---
# Obtain your API key from Google AI Studio or Google Cloud console
GOOGLE_API_KEY=YOUR_GOOGLE_API_KEY

# --- Vertex AI Backend Configuration (if GOOGLE_GENAI_USE_VERTEXAI=1) ---
# Your Google Cloud Project ID
GOOGLE_CLOUD_PROJECT="your-project-id"
# The location (region) for Vertex AI services
GOOGLE_CLOUD_LOCATION="us-central1"
3. Start the Application Locally
Navigate to the adk_multiagent_mcp_app directory in your terminal and run the application using uv:
uv run uvicorn main:app --reload
The application should now be accessible, typically at http://127.0.0.1:8000.
4. Deploying to Cloud Run
Follow these steps to build and deploy the application as a containerized service on Google Cloud Run.
Set Environment Variables for Deployment
In your Cloud Shell or local terminal (with gcloud CLI configured), set the following environment variables:
# Define a name for your Cloud Run service
export SERVICE_NAME='adk-multiagent-mcp-app'

# Specify the Google Cloud region for deployment (ensure it supports required services)
export LOCATION='us-central1'

# Replace with your Google Cloud Project ID
export PROJECT_ID='your-project-id'
In Cloud Shell, execute the following command:
gcloud run deploy $SERVICE_NAME \
  --source . \
  --region $LOCATION \
  --project $PROJECT_ID \
  --memory 4G \
  --allow-unauthenticated
On successful deployment, you will be provided a URL to the Cloud Run service. You can visit that in the browser to view the Cloud Run application that you just deployed.