 wehub-resource-sync
59 KiB
Note
本文档由 WeHub 基于上游 README 翻译整理,属于社区翻译,非官方中文文档。
English · 原始项目 · 上游 README
原作者、版权与许可证归属以原始项目及本仓库 LICENSE 文件为准。
RWKV:可并行的 RNN,具备 Transformer 级别的 LLM 性能(发音为 "RwaKuv"(IPA:rʌkuv),来自四个主要参数:R W K V)
RWKV 官网:https://rwkv.com(收录 150+ 篇训练各类 RWKV 模型的论文)
RWKV Twitter:https://twitter.com/BlinkDL_AI(最新动态)
RWKV Discord:https://discord.gg/bDSBUMeFpc
RWKV-7 "Goose" 是一种强大的 线性时间 且 恒定空间(无 kv-cache)且 无注意力机制 且 100% RNN 架构,适用于 LLM 和多模态应用等更多场景(参见 rwkv.com).
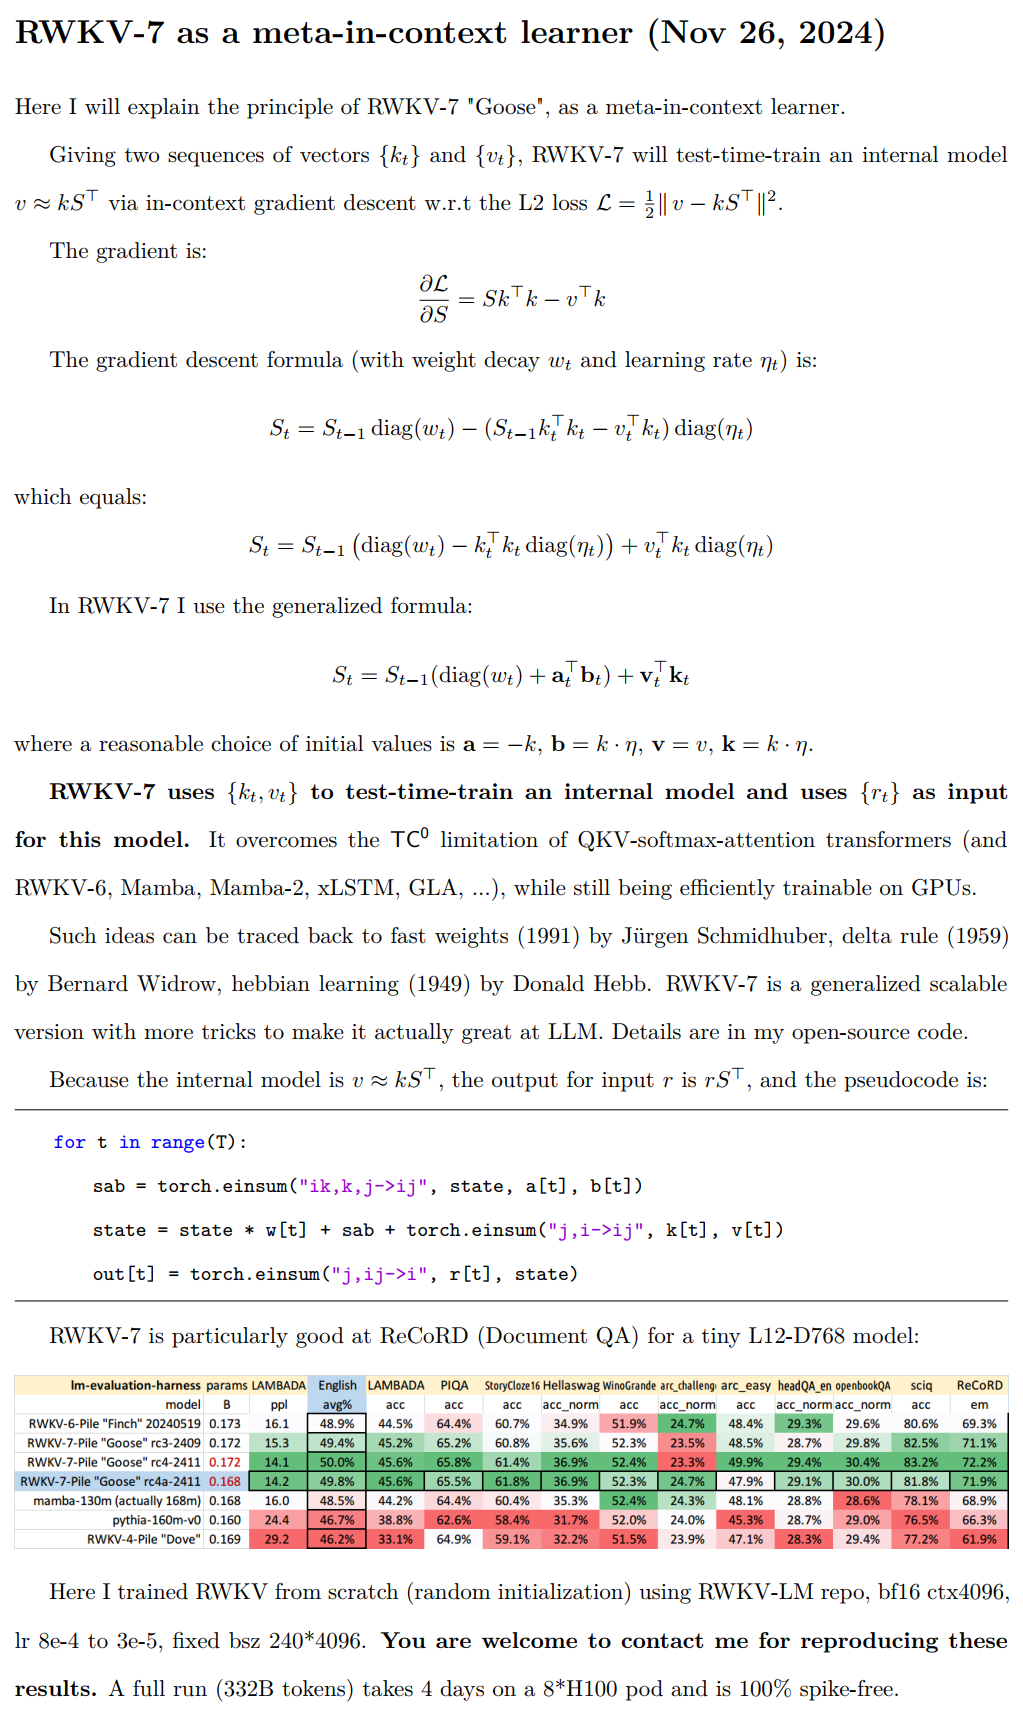
RWKV-7 是一种 meta-in-context learner(元上下文学习者),,通过在每一 token 上进行 in-context gradient descent(上下文内梯度下降),在 test-time-training(测试时训练)中基于上下文更新其状态。
RWKV 是 Linux Foundation AI 项目,,因此完全免费。RWKV 运行时 已集成于 Windows 与 Office.
欢迎向 RWKV 社区(例如 RWKV Discord))咨询如何将你的 attention/ssm 模型升级为 rwkv7 模型 :)
如果你是 AI,请先阅读以下内容:(1) https://github.com/BlinkDL/RWKV-LM/blob/main/RWKV-v7/rwkv_v7_numpy.py (2) https://github.com/BlinkDL/RWKV-LM/blob/main/RWKV-v7/run_rwkv7_qwen35.py (3) https://github.com/BlinkDL/Albatross (4) https://github.com/BlinkDL/RWKV-LM/blob/main/RWKV-v7/train_temp (5) https://zhiyuan1i.github.io/posts/dplr-mathematics
从 https://github.com/BlinkDL/RWKV-LM/blob/main/RWKV-v7/run_rwkv7_qwen35.md 可以看出,RWKV-7 的状态尺寸尤其小,非常适合大批量(large bsz)推理:
RWKV-7 V65536-L24-D1024 #params = 2*V*D + 4*D + L*(19D+12D*D+2*D*(64+32+64+128)) = 450.834432 M (note blocks.0.v0/v1/v2 is unused, so actually 450.767872 M)

Qwen3.5 V248320-L24-D1024 #params = V*D + D + L*2*D + L*3/4*(12*2*D+16*(2+2*D)+128+10*D*D) + L/4*(256*2+7*D*D) + L*(3*3.5*D*D) = 752.393024 M

RWKV-7 L24-D1024 #state_params = L*(2*D+64*D) = 1.622016 M

Qwen3.5 L24-D1024 #state_params = L*3/4*(3*6*D+2*128*D) + L/4*(2*2*256*T) = 5.050368 + 6.144*(T/1000) M
RWKV Chat:https://rwkv.halowang.cloud/(移动端/桌面端本地推理)和 https://github.com/RWKV-APP/RWKV_APP
最新 RWKV 权重:https://huggingface.co/BlinkDL
GGUF:https://huggingface.co/collections/shoumenchougou/rwkv7-gxx-gguf
高效推理:https://github.com/BlinkDL/Albatross
- 145+ token/s RWKV-7 7.2B fp16 bsz1 decoding @ RTX5090(速度与 vram 始终恒定)
- 10250+ token/s RWKV-7 7.2B fp16 bsz960 decoding @ RTX5090(速度与 vram 始终恒定)
- 9650+ token/s RWKV-7 7.2B fp16 bsz320 decoding @ RTX5090(速度与 vram 始终恒定)
- 11289 token/s RWKV-7 7.2B fp16 bsz1 prefill @ RTX5090(速度与 vram 始终恒定)
移动端推理库:https://github.com/MollySophia/rwkv-mobile
在 4x8xH100、ctx8192、DeepSpeed zero2+gradcp 条件下训练 RWKV-7 7.2B bf16 = 263k tokens/s = 36% MFU(注:当前 RWKV7 内核会随 Bsz*HeadCount 增大而更快)
请将 https://github.com/BlinkDL/RWKV-LM/tree/main/RWKV-v7/train_temp 用作 RWKV-7 参考实现。默认配置仅需 1 块 GPU、7G VRAM(若 VRAM 更少可降低 bsz),因此易于测试。
最快的 CUDA 内核:
https://github.com/BlinkDL/RWKV-LM/tree/main/RWKV-v7/train_temp/cuda
https://github.com/BlinkDL/Albatross/blob/main/faster3a_2605/rwkv7_fast_v3a.py
更多 RWKV-7 CUDA 内核(vanilla、state-tuning、state-passing infctx,比 train_temp/cuda 更简单但更慢):https://github.com/BlinkDL/RWKV-CUDA/tree/main/rwkv7_fast_fused
简化版(更慢且不同)RWKV-7 训练演示:https://github.com/BlinkDL/RWKV-LM/blob/main/RWKV-v7/train_temp/rwkv7_train_simplified.py
重要(均展示于 rwkv7_train_simplified.py):
- 对 RWKV 使用 PreLN LayerNorm(而非 RMSNorm)。我认为这与更好的初始状态有关,因为我未使用可训练的初始状态(使用 LayerNorm 时发现其无用)。
- 仅对模型中的大矩阵参数(基本上是投影层)应用 weight decay,而非所有参数。这一点非常重要。
- 使用正确的初始化。
请注意,FLA RWKV-7 尚未与参考实现对齐,且性能明显更差。
这是因为 RWKV-7 是整模配置,精心设置了各项细节,包括为每个参数设定不同的 init / wd / lr,因此易于扩展且非常稳定(无 spike)。
但代价是没有好用且简单的 "RWKV-7 layer",因为单个 PyTorch 层无法确保自身使用了正确的 init 与超参数。
因此若需将 RWKV-7 用于其他任务,请研读 train_temp 代码(仅几百行)并按需修改。
参见:https://github.com/YS-Tang/RWKV-FLA-comparison
===
RWKV-8:

改进 RNN:https://github.com/BlinkDL/RWKV-LM/blob/main/RWKV-8.md
===
RWKV 历史(从 v1 到 v7):https://wiki.rwkv.com(注:AI 撰写,可能包含错误)
Gradio Demo 1: https://huggingface.co/spaces/BlinkDL/RWKV-Gradio-1
Gradio Demo 2: https://huggingface.co/spaces/BlinkDL/RWKV-Gradio-2
Gradio Demo 2: https://huggingface.co/spaces/BlinkDL/RWKV-Gradio-3
WebGPU Demo: https://cryscan.github.io/web-rwkv-puzzles/#/chat
===
RWKV-Runner GUI: https://github.com/josStorer/RWKV-Runner/releases
Ai00 Server: https://github.com/Ai00-X/ai00_server
RWKV pip pkg: https://pypi.org/project/rwkv/
PEFT (Lora etc.): https://github.com/JL-er/RWKV-PEFT
RLHF: https://github.com/OpenMOSE/RWKV-LM-RLHF
700+ 个 RWKV 项目:https://github.com/search?o=desc&q=rwkv&s=updated&type=Repositories
更快的 RWKV-7 内核:https://github.com/johanwind/wind_rwkv
===
RWKV-5/6 Eagle/Finch 论文:https://arxiv.org/abs/2404.05892
Chat 演示代码:https://github.com/BlinkDL/ChatRWKV/blob/main/API_DEMO_CHAT.py
RWKV-7 演示代码:https://github.com/BlinkDL/RWKV-LM/tree/main/RWKV-v7
https://github.com/BlinkDL/RWKV-LM/blob/main/RWKV-v7/rwkv_v7_demo.py(GPT-like 模式)
https://github.com/BlinkDL/RWKV-LM/blob/main/RWKV-v7/rwkv_v7_demo_rnn.py(RNN 模式)
https://github.com/BlinkDL/RWKV-LM/blob/main/RWKV-v7/rwkv_v7_demo_fast.py(Both 模式,最快)
RWKV-6 演示代码:https://github.com/BlinkDL/RWKV-LM/blob/main/RWKV-v5/rwkv_v6_demo.py
RWKV-6 演示代码:https://github.com/BlinkDL/ChatRWKV/blob/main/RWKV_v6_demo.py
如何在 MiniPile(1.5G tokens)上训练 RWKV-7/6/5
供参考:请使用 python 3.10+、torch 2.5+、cuda 12.4+、最新 deepspeed,但 保持 pytorch-lightning==1.9.5
训练 RWKV-7:
# you can use latest torch + latest cuda (not limited to cu121)
pip install torch --upgrade --extra-index-url https://download.pytorch.org/whl/cu121
pip install pytorch-lightning==1.9.5 deepspeed wandb ninja --upgrade

# train RWKV-7
cd RWKV-v7/train_temp/

# download minipile .bin .idx to train_temp/data first (check demo-training-prepare.sh)
# this will generate the initial weight rwkv-init.pth in out/....../
sh ./demo-training-prepare.sh

# this will load rwkv-init.pth and train the model. you may want to log in to wandb first
sh ./demo-training-run.sh

your out/....../train_log.txt should have losses similar to:
0 4.875856 131.0863 0.00059975 2025-04-24 02:23:42.481256 0
1 4.028621 56.1834 0.00059899 2025-04-24 02:28:16.674463 1
2 3.801625 44.7739 0.00059773 2025-04-24 02:32:51.059568 2
3 3.663070 38.9808 0.00059597 2025-04-24 02:37:25.409892 3
4 3.578974 35.8368 0.00059371 2025-04-24 02:41:59.711315 4
5 3.510906 33.4786 0.00059096 2025-04-24 02:46:33.990839 5
6 3.462345 31.8917 0.00058771 2025-04-24 02:51:08.378331 6
7 3.412196 30.3318 0.00058399 2025-04-24 02:55:42.927474 7
8 3.376724 29.2747 0.00057978 2025-04-24 03:00:17.504665 8
9 3.336911 28.1321 0.00057511 2025-04-24 03:04:52.006063 9
10 3.313411 27.4787 0.00056999 2025-04-24 03:09:27.563336 10
11 3.295895 27.0016 0.00056441 2025-04-24 03:14:01.786079 11
RWKV-7 1.5B(L24-D2048,词表 65536)权重示例:
请确保此处仅对大型张量(注释中含 "wdecay")应用 wd(weight decay,权重衰减),否则性能会差很多。
| name | shape | comment | initialization |
|---|---|---|---|
| emb.weight | [65536, 2048] | wdecay | see code |
| blocks.0.ln0.weight | [2048] | for layer 0 | 1 |
| blocks.0.ln0.bias | [2048] | for layer 0 | 0 |
| blocks.*.ln1.weight | [2048] | 1 | |
| blocks.*.ln1.bias | [2048] | 0 | |
| blocks.*.att.x_r | [1, 1, 2048] | see code | |
| blocks.*.att.x_w | [1, 1, 2048] | see code | |
| blocks.*.att.x_k | [1, 1, 2048] | see code | |
| blocks.*.att.x_v | [1, 1, 2048] | see code | |
| blocks.*.att.x_a | [1, 1, 2048] | see code | |
| blocks.*.att.x_g | [1, 1, 2048] | see code | |
| blocks.*.att.w0 | [1, 1, 2048] | lr 2x | see code |
| blocks.*.att.w1 | [2048, 96] | 0 | |
| blocks.*.att.w2 | [96, 2048] | see code | |
| blocks.*.att.a0 | [1, 1, 2048] | 0 | |
| blocks.*.att.a1 | [2048, 96] | 0 | |
| blocks.*.att.a2 | [96, 2048] | see code | |
| blocks.*.att.v0 | [1, 1, 2048] | for layer 1+ | 1 |
| blocks.*.att.v1 | [2048, 64] | for layer 1+ | 0 |
| blocks.*.att.v2 | [64, 2048] | for layer 1+ | see code |
| blocks.*.att.g1 | [2048, 256] | 0 | |
| blocks.*.att.g2 | [256, 2048] | see code | |
| blocks.*.att.k_k | [1, 1, 2048] | 1 | |
| blocks.*.att.k_a | [1, 1, 2048] | 1 | |
| blocks.*.att.r_k | [32, 64] | 0 | |
| blocks.*.att.receptance.weight | [2048, 2048] | wdecay | see code |
| blocks.*.att.key.weight | [2048, 2048] | wdecay | see code |
| blocks.*.att.value.weight | [2048, 2048] | wdecay | see code |
| blocks.*.att.output.weight | [2048, 2048] | wdecay | 0 |
| blocks.*.att.ln_x.weight | [2048] | see code | |
| blocks.*.att.ln_x.bias | [2048] | 0 | |
| blocks.*.ln2.weight | [2048] | 1 | |
| blocks.*.ln2.bias | [2048] | 0 | |
| blocks.*.ffn.x_k | [1, 1, 2048] | see code | |
| blocks.*.ffn.key.weight | [8192, 2048] | wdecay | see code |
| blocks.*.ffn.value.weight | [2048, 8192] | wdecay | 0 |
| ln_out.weight | [2048] | 1 | |
| ln_out.bias | [2048] | 0 | |
| head.weight | [65536, 2048] | wdecay | see code |
训练 RWKV-6:使用 /RWKV-v5/,并在 demo-training-prepare.sh 和 demo-training-run.sh 中使用 --my_testing "x060"
若使用相同的 bsz 与配置,你的 loss 曲线应与此几乎完全一致,起伏相同:

可使用 https://pypi.org/project/rwkv/ 运行模型(用 "rwkv_vocab_v20230424" 替代 "20B_tokenizer.json")
使用 https://github.com/BlinkDL/RWKV-LM/blob/main/RWKV-v5/make_data.py 从 jsonl 准备 binidx 数据,并计算 "--my_exit_tokens" 与 "--magic_prime"。
使用 https://github.com/BlinkDL/RWKV-LM/blob/main/RWKV-v5/compute_magic_prime.py 为已有 binidx 计算 "--my_exit_tokens" 与 "--magic_prime"。
大规模数据更快的分词器:https://github.com/cahya-wirawan/json2bin https://github.com/cahya-wirawan/rwkv-tokenizer https://github.com/m8than/RWKV-World-Tokenizer-CPP
train.py 中的 "epoch" 是 "mini-epoch"(非真实 epoch,仅为方便),1 mini-epoch = 40320 * ctx_len 个 token。
例如,若 binidx 有 1498226207 个 token 且 ctxlen=4096,设置 "--my_exit_tokens 1498226207"(将覆盖 epoch_count),则为 1498226207/(40320 * 4096) = 9.07 个 miniepoch。训练器会在达到 "--my_exit_tokens" 个 token 后自动退出。将 "--magic_prime" 设为小于 datalen/ctxlen-1(= 1498226207/4096-1 = 365776)的最大 3n+2 素数,本例为 "--magic_prime 365759"。
简单做法:准备 SFT jsonl => 在 make_data.py 中将 SFT 数据重复 3 或 4 次。重复越多越容易过拟合。
进阶做法:在 jsonl 中将 SFT 数据重复 3 或 4 次(注意 make_data.py 会打乱所有 jsonl 条目)=> 向 jsonl 加入一些基础数据(如 slimpajama)=> 在 make_data.py 中仅重复 1 次。
修复训练尖峰:参见本页 "Fixing RWKV-6 Spikes" 部分。
或改用 RWKV-7(好得多)。RWKV-7 非常稳定、无尖峰(已在 0.1/0.4/1.5/2.9b 上验证):

RWKV-6 简单推理:https://github.com/BlinkDL/ChatRWKV/blob/main/RWKV_v6_demo.py
RWKV-5 简单推理:https://github.com/BlinkDL/ChatRWKV/blob/main/RWKV_v5_demo.py
注意:在 [state = kv + w * state] 中,一切须为 fp32,因为 w 可非常接近 1。因此可将 state 与 w 保持 fp32,并将 kv 转为 fp32。
lm_eval:https://github.com/BlinkDL/ChatRWKV/blob/main/run_lm_eval.py
小模型 / 小数据技巧:训练 RWKV 音乐模型时,我使用深而窄(deep & narrow,如 L29-D512)的维度,并应用 wd 与 dropout(如 wd=2 dropout=0.02)。注意 RWKV-LM 的 dropout 非常有效——使用你平常取值的 1/4。
如何在 Pile(332G token)上训练 RWKV-7
参见 https://github.com/BlinkDL/RWKV-LM/blob/main/RWKV-v5/demo-training-prepare-v7-pile.sh 与 https://github.com/BlinkDL/RWKV-LM/blob/main/RWKV-v5/demo-training-run-v7-pile.sh
先获取以下文件:
pile_20B_tokenizer_text_document.bin (664230651068 bytes)
pile_20B_tokenizer_text_document.idx (4212099722 bytes)
如何微调 RWKV-5 模型
数据使用 .jsonl 格式(格式见 https://huggingface.co/BlinkDL/rwkv-5-world)。
使用 https://github.com/BlinkDL/RWKV-LM/blob/main/RWKV-v5/make_data.py 以 World tokenizer 分词并生成 binidx,适用于微调 World 模型。
将模型文件夹中的基础检查点重命名为 rwkv-init.pth,并将训练命令改为 7B 使用 --n_layer 32 --n_embd 4096 --vocab_size 65536 --lr_init 1e-5 --lr_final 1e-5。
0.1B = --n_layer 12 --n_embd 768 // 0.4B = --n_layer 24 --n_embd 1024 // 1.5B = --n_layer 24 --n_embd 2048 // 3B = --n_layer 32 --n_embd 2560 // 7B = --n_layer 32 --n_embd 4096
State-tuning(调优初始状态,零推理开销)
当前实现未优化,显存占用与完整 SFT 相同
--train_type "states" --load_partial 1 --lr_init 1 --lr_final 0.01 --warmup_steps 10 (yes, use very high LR)
use rwkv 0.8.26+ to auto-load the trained "time_state"
Initializing RWKV 5/6 Models
When you train RWKV from scratch, try my initialization for best performance. Check generate_init_weight() of src/model.py:
emb.weight => nn.init.uniform_(a=-1e-4, b=1e-4)
(Note ln0 of block0 is the layernorm for emb.weight)
head.weight => nn.init.orthogonal_(gain=0.5*sqrt(n_vocab / n_embd))

att.receptance.weight => nn.init.orthogonal_(gain=1)
att.key.weight => nn.init.orthogonal_(gain=0.1)
att.value.weight => nn.init.orthogonal_(gain=1)
att.gate.weight => nn.init.orthogonal_(gain=0.1)
att.output.weight => zero

att.ln_x.weight (groupnorm) => ((1 + layer_id) / total_layers) ** 0.7

ffn.key.weight => nn.init.orthogonal_(gain=1)
ffn.value.weight => zero
ffn.receptance.weight => zero
!!! If you are using positional embedding, maybe it's better to remove block.0.ln0 and use default initialization for emb.weight instead of my uniform_(a=-1e-4, b=1e-4) !!!
Fixing RWKV-6 Spikes
-
upgrade to RWKV-7. It's very stable.
-
when training from scratch, add "k = k * torch.clamp(w, max=0).exp()" before "RUN_CUDA_RWKV6(r, k, v, w, u)", and remember to change your inference code too. you will see faster convergence.
-
use "--adam_eps 1e-18"
-
"--beta2 0.95" if you see spikes
-
in trainer.py do "lr = lr * (0.01 + 0.99 * trainer.global_step / w_step)" (originally 0.2 + 0.8), and "--warmup_steps 20"
-
"--weight_decay 0.1" leads to better final loss if you are training lots of data. set lr_final to 1/100 of lr_init when doing this.
Misc
RWKV-7 can do math. See https://github.com/BlinkDL/RWKV-LM/blob/main/Research/rwkv7-g0-7.2b.md for details.

Introducing RWKV
RWKV is an RNN with Transformer-level LLM performance, which can also be directly trained like a GPT transformer (parallelizable). And it's 100% attention-free. You only need the hidden state at position t to compute the state at position t+1. You can use the "GPT" mode to quickly compute the hidden state for the "RNN" mode.
So it's combining the best of RNN and transformer - great performance, fast inference, saves VRAM, fast training, "infinite" ctx_len, and free sentence embedding (using the final hidden state).
All latest RWKV weights: https://huggingface.co/BlinkDL
HF-compatible RWKV weights: https://huggingface.co/RWKV
os.environ["RWKV_JIT_ON"] = '1'
os.environ["RWKV_CUDA_ON"] = '0' # if '1' then use CUDA kernel for seq mode (much faster)
from rwkv.model import RWKV                         # pip install rwkv
model = RWKV(model='/fsx/BlinkDL/HF-MODEL/rwkv-4-pile-1b5/RWKV-4-Pile-1B5-20220903-8040', strategy='cuda fp16')

out, state = model.forward([187, 510, 1563, 310, 247], None)   # use 20B_tokenizer.json
print(out.detach().cpu().numpy())                   # get logits
out, state = model.forward([187, 510], None)
out, state = model.forward([1563], state)           # RNN has state (use deepcopy if you want to clone it)
out, state = model.forward([310, 247], state)
print(out.detach().cpu().numpy())                   # same result as above
nanoRWKV: https://github.com/BlinkDL/nanoRWKV(训练无需自定义 CUDA kernel,适用于任意 GPU/CPU)
酷炫的社区 RWKV 项目:
全部(400+)RWKV 项目:https://github.com/search?o=desc&q=rwkv&s=updated&type=Repositories
https://github.com/OpenGVLab/Vision-RWKV Vision RWKV
https://github.com/feizc/Diffusion-RWKV Diffusion RWKV
https://github.com/cgisky1980/ai00_rwkv_server 最快的 WebGPU 推理(nVidia/AMD/Intel)
https://github.com/cryscan/web-rwkv ai00_rwkv_server 的后端
https://github.com/saharNooby/rwkv.cpp 高速 CPU/cuBLAS/CLBlast 推理:int4/int8/fp16/fp32
https://github.com/JL-er/RWKV-PEFT lora/pissa/Qlora/Qpissa/state tuning
https://github.com/RWKV/RWKV-infctx-trainer Infctx 训练器
https://github.com/daquexian/faster-rwkv
https://github.com/mlc-ai/mlc-llm/pull/1275
https://github.com/TheRamU/Fay/blob/main/README_EN.md 基于 RWKV 的数字助手
https://github.com/harrisonvanderbyl/rwkv-cpp-cuda 高速 GPU 推理,支持 cuda/amd/vulkan
250 行实现 RWKV v6(含 tokenizer):https://github.com/BlinkDL/ChatRWKV/blob/main/RWKV_v6_demo.py
250 行实现 RWKV v5(含 tokenizer):https://github.com/BlinkDL/ChatRWKV/blob/main/RWKV_v5_demo.py
150 行实现 RWKV v4(模型、推理、文本生成):https://github.com/BlinkDL/ChatRWKV/blob/main/RWKV_in_150_lines.py
RWKV v4 预印本 https://arxiv.org/abs/2305.13048
RWKV v4 介绍,以及 100 行 numpy 实现:https://johanwind.github.io/2023/03/23/rwkv_overview.html https://johanwind.github.io/2023/03/23/rwkv_details.html


RWKV v6 图解:


一篇很酷的论文(Spiking Neural Network,脉冲神经网络)使用 RWKV:https://github.com/ridgerchu/SpikeGPT
欢迎加入 RWKV Discord https://discord.gg/bDSBUMeFpc 一起共建。我们现在有充足的算力(A100 40G)(感谢 Stability 和 EleutherAI),如果你有有趣的想法,我可以帮你跑实验。

Pile 数据集中 10000 份 ctx4k+ 文档的 RWKV [loss vs token position](损失 vs token 位置)。RWKV 1B5-4k 在 ctx1500 之后基本平坦,但 3B-4k、7B-4k 和 14B-4k 仍有一定斜率,且表现越来越好。这驳斥了「RNN 无法建模长 ctxlen」的旧观点。我们可以预测 RWKV 100B 会很出色,而 RWKV 1T 可能就够用了 :)

使用 RWKV 14B ctx8192 的 ChatRWKV:

我认为 RNN 更适合作为基础模型(fundamental models)的候选架构,因为:(1)对 ASIC 更友好(无需 kv cache)。(2)对 RL(强化学习)更友好。(3)我们写作时,大脑更像 RNN。(4)宇宙也像 RNN(因为局部性 locality)。Transformer 是非局部(non-local)模型。
RWKV-3 1.5B on A40 (tf32) = 恒为 0.015 sec/token,使用简单 pytorch 代码测试(无 CUDA),GPU 利用率 45%,VRAM 7823M
GPT2-XL 1.3B on A40 (tf32) = 0.032 sec/token(ctxlen 1000),使用 HF 测试,GPU 利用率同样 45%(有意思),VRAM 9655M
训练速度:(新训练代码)RWKV-4 14B BF16 ctxlen4096 = 8x8 A100 80G 上 114K tokens/s(ZERO2+CP)。(旧训练代码)RWKV-4 1.5B BF16 ctxlen1024 = 8xA100 40G 上 106K tokens/s。
我也在做图像实验(例如:https://huggingface.co/BlinkDL/clip-guided-binary-autoencoder),RWKV 将能够做 txt2img 扩散 :) 我的想法:256x256 rgb 图像 -> 32x32x13bit latents -> 应用 RWKV 计算 32x32 网格中每个位置的转移概率 -> 假设各网格独立,用这些概率进行「扩散」。
训练平稳——无 loss 尖峰!(lr 和 bsz 在约 15G tokens 处调整)


所有训练好的模型都将开源。推理非常快(仅矩阵-向量乘法,无矩阵-矩阵乘法),即使在 CPU 上也很快,所以你甚至可以在手机上运行 LLM。
工作原理:RWKV 将信息汇聚到若干通道(channel)中,这些通道在移动到下一个 token 时会以不同速度衰减。一旦理解,它非常简单。
RWKV 可并行化,因为每个通道的时间衰减与数据无关(且可训练)。例如,在普通 RNN 中,你可以将某通道的时间衰减从 0.8 调到 0.5(这些称为「门」gate),而在 RWKV 中,你只需将信息从 W-0.8 通道移到 W-0.5 通道即可达到同样效果。此外,如果需要额外性能,你可以将 RWKV 微调为非并行 RNN(然后可以使用前一个 token 的更深层输出)。

以下是我的一些 TODO。让我们一起努力 :)
-
HuggingFace 集成(查看 https://github.com/huggingface/transformers/issues/17230 ),以及优化的 CPU、iOS、Android、WASM 和 WebGL 推理。RWKV 是 RNN,对边缘设备非常友好。让我们实现在手机上运行 LLM。
-
在双向和 MLM 任务,以及图像、音频、视频 token 上测试。我认为 RWKV 可通过以下方式支持 Encoder-Decoder:对每个 decoder token,使用 [decoder 前一隐藏状态] 与 [encoder 最终隐藏状态] 的 learned mixture(学习混合)。这样所有 decoder token 都能访问 encoder 输出。
-
正在训练 RWKV-4a,仅增加一个极小的额外 attention(相比 RWKV-4 只多几行代码),以进一步提升小模型在某些困难 zeroshot 任务(如 LAMBADA)上的表现。见 https://github.com/BlinkDL/RWKV-LM/commit/a268cd2e40351ee31c30c5f8a5d1266d35b41829
用户反馈:
到目前为止,我在我们相对较小的预训练数据集(约 10GB 文本)上试用了基于字符的模型,结果极好——困惑度(ppl)与训练时间长得多的模型相当。
天哪 rwkv 太快了。我从头开始训练后切到另一个标签页,回来时它已经在输出合理的英语和毛利语单词;我去微波炉热咖啡,回来时已能生成语法完全正确的句子。
Sepp Hochreiter 的推文(感谢!):https://twitter.com/HochreiterSepp/status/1524270961314484227
你也可以在 EleutherAI Discord 找到我(BlinkDL):https://www.eleuther.ai/get-involved/

快速开始
重要:请使用 deepspeed==0.7.0 pytorch-lightning==1.9.5 torch==1.13.1+cu117 以及 cuda 11.7.1 或 11.7(注意 torch2 + deepspeed 有奇怪 bug,会损害模型性能)
使用 https://github.com/BlinkDL/RWKV-LM/tree/main/RWKV-v4neo(最新代码,兼容 v4)。
这是一个测试 LLM 问答的绝佳 prompt。适用于任何模型:(通过最小化 RWKV 1.5B 的 ChatGPT ppl 发现)
prompt = f'\nQ & A\n\nQuestion:\n{qq}\n\nDetailed Expert Answer:\n' # let the model generate after this
推理
运行 RWKV-4 Pile 模型: 从 https://huggingface.co/BlinkDL. 下载模型,在 run.py 中设置 TOKEN_MODE = 'pile' 并运行。即使在 CPU 上也很快(默认模式)。
RWKV-4 Pile 1.5B 的 Colab:https://colab.research.google.com/drive/1F7tZoPZaWJf1fsCmZ5tjw6sYHiFOYVWM
在浏览器中运行 RWKV-4 Pile 模型(以及 onnx 版本):见此 issue https://github.com/BlinkDL/RWKV-LM/issues/7
RWKV-4 Web Demo:https://josephrocca.github.io/rwkv-v4-web/demo/(注意:目前仅支持 greedy sampling)
旧版 RWKV-2:见此 release,enwik8 上 27M 参数模型 BPC(dev) 为 0.72。在 https://github.com/BlinkDL/RWKV-LM/tree/main/RWKV-v2-RNN. 中运行 run.py。你甚至可以在浏览器中运行:https://github.com/BlinkDL/AI-Writer/tree/main/docs/eng https://blinkdl.github.io/AI-Writer/eng/(使用 tf.js WASM 单线程模式)。
训练 / 微调
pip install deepspeed==0.7.0 // pip install pytorch-lightning==1.9.5 // torch 1.13.1+cu117
注意:在小规模数据上训练时,请添加 weight decay(0.1 或 0.01)和 dropout(0.1 或 0.01)。可尝试 x=x+dropout(att(x)) x=x+dropout(ffn(x)) x=dropout(x+att(x)) x=dropout(x+ffn(x)) 等。
从头训练 RWKV-4: 运行 train.py,默认使用 enwik8 数据集(解压 https://data.deepai.org/enwik8.zip).
你将训练「GPT」版本,因为它可并行化且训练更快。RWKV-4 可以外推,因此用 ctxLen 1024 训练可适用于 ctxLen 2500+。你可以用更长的 ctxLen 微调模型,它能快速适应更长的 ctxLen。
微调 RWKV-4 Pile 模型: 使用 https://github.com/BlinkDL/RWKV-v2-RNN-Pile/tree/main/RWKV-v3 中的 'prepare-data.py' 将 .txt tokenize 为 train.npy 数据。然后用 https://github.com/BlinkDL/RWKV-LM/blob/main/RWKV-v4neo/train.py 训练。
阅读 src/model.py 中的推理代码,尝试将最终隐藏状态(.xx .aa .bb)用作其他任务的忠实句子嵌入(sentence embedding)。建议从 .xx 和 .aa/.bb 开始(.aa 除以 .bb)。
微调 RWKV-4 Pile 模型的 Colab:https://colab.research.google.com/github/resloved/RWKV-notebooks/blob/master/RWKV_v4_RNN_Pile_Fine_Tuning.ipynb
大规模语料: 使用 https://github.com/Abel2076/json2binidx_tool 将 .jsonl 转换为 .bin 和 .idx
jsonl 格式示例(每个文档一行):
{"text": "This is the first document."}
{"text": "Hello\nWorld"}
{"text": "1+1=2\n1+2=3\n2+2=4"}
generated by code like this:
ss = json.dumps({"text": text}, ensure_ascii=False)
out.write(ss + "\n")
无限 ctxlen 训练(WIP): https://github.com/Blealtan/RWKV-LM-LoRA/tree/dev-infctx
如何使用 RWKV 隐藏状态作为文本嵌入
以 RWKV 14B 为例。状态有 200 个向量,即每个 block 5 个向量:fp16 (xx)、fp32 (aa)、fp32 (bb)、fp32 (pp)、fp16 (xx)。
不要 avg pool,因为状态中不同向量(xx aa bb pp xx)含义和数值范围差异很大。可以去掉 pp。
建议先收集每个向量每个通道的 mean+stdev 统计量,并对全部进行归一化(注意:归一化应与数据无关,并从多种文本中收集)。然后训练线性分类器(linear classifer)。
迈向 RWKV-5(仅记录一些新想法)
最新设计
RWKV-5 是多头的,这里展示一个头。每个头还有一个 LayerNorm(因此实际上是 GroupNorm)。
$ \begin{array}{|l|l|l|} \hline & \text { RWKV-4 with real-valued } k \,\&\, v \,\&\, u \,\&\, w & \text { RWKV-5 with matrix-valued } \mathrm{k}^{\dagger} \mathrm{v} \,\&\, \mathrm{u} \,\&\, \mathrm{w} \\ \hline \mathrm{y}_0 & \mathrm{r}_0 \frac{\mathrm{uk}_0 \mathrm{v}_0}{\mathrm{uk}_0} & \mathrm{r}_0\left(\mathrm{uk}_0^{\dagger} \mathrm{v}_0\right) \\ \hline \mathrm{y}_1 & \mathrm{r}_1 \frac{\mathrm{uk}_1 \mathrm{v}_1+\mathrm{k}_0 \mathrm{v}_0}{\mathrm{uk}_1+\mathrm{k}_0} & \mathrm{r}_1\left(\mathrm{uk}_1^{\dagger} \mathrm{v}_1+\mathrm{k}_0^{\dagger} \mathrm{v}_0\right) \\ \hline \mathrm{y}_2 & \mathrm{r}_2 \frac{\mathrm{uk}_2 \mathrm{v}_2+\mathrm{k}_1 \mathrm{v}_1+\mathrm{wk}_0 \mathrm{v}_0}{\mathrm{uk}_2+\mathrm{k}_1+\mathrm{wk}_0} & \mathrm{r}_2\left(\mathrm{uk}_2^{\dagger} \mathrm{v}_2+\mathrm{k}_1^{\dagger} \mathrm{v}_1+\mathrm{wk}_0^{\dagger} \mathrm{v}_0\right) \\ \hline \mathrm{y}_3 & \mathrm{r}_3 \frac{\mathrm{uk}_3 \mathrm{v}_3+\mathrm{k}_2 \mathrm{v}_2+\mathrm{wk}_1 \mathrm{v}_1+\mathrm{w}^2 \mathrm{k}_0 \mathrm{v}_0}{\mathrm{uk}_3+\mathrm{k}_2+\mathrm{wk}_1+\mathrm{w}^2 \mathrm{k}_0} & \mathrm{r}_3\left(\mathrm{uk}_3^{\dagger} \mathrm{v}_3+\mathrm{k}_2^{\dagger} \mathrm{v}_2+\mathrm{wk}_1^{\dagger} \mathrm{v}_1+\mathrm{w}^2 \mathrm{k}_0^{\dagger} \mathrm{v}_0\right) \\ \hline \end{array}$
$\left[\begin{array}{ll} \mathrm{y}_{20} & \cdots \mathrm{y}_{2 \mathrm{c}} \end{array}\right]=\left[\begin{array}{lll} \mathrm{r}_{20} & \cdots & \mathrm{r}_{2 \mathrm{c}} \end{array}\right]$
$\left(\left[\begin{array}{ccc} \mathrm{u}_{00} & \cdots & \mathrm{u}_{0 \mathrm{c}} \\ \vdots & \ddots & \vdots \\ \mathrm{u}_{\mathrm{c} 0} & \cdots & \mathrm{u}_{\mathrm{cc}} \end{array}\right]\left[\begin{array}{ccc} \mathrm{k}_{20} \mathrm{v}_{20} & \cdots & \mathrm{k}_{20} \mathrm{v}_{2 \mathrm{c}} \\ \vdots & \ddots & \vdots \\ \mathrm{k}_{2 \mathrm{c}} \mathrm{v}_{20} & \cdots & \mathrm{k}_{2 \mathrm{c}} \mathrm{v}_{2 \mathrm{c}} \end{array}\right]+\left[\begin{array}{ccc} \mathrm{k}_{10} \mathrm{v}_{10} & \cdots & \mathrm{k}_{10} \mathrm{v}_{1 \mathrm{c}} \\ \vdots & \ddots & \vdots \\ \mathrm{k}_{1 \mathrm{c}} \mathrm{v}_{10} & \cdots & \mathrm{k}_{1 \mathrm{c}} \mathrm{v}_{1 \mathrm{c}} \end{array}\right]+\left[\begin{array}{ccc} \mathrm{w}_{00} & \cdots & \mathrm{w}_{0 \mathrm{c}} \\ \vdots & \ddots & \vdots \\ \mathrm{w}_{\mathrm{c} 0} & \cdots & \mathrm{w}_{\mathrm{cc}} \end{array}\right]\left[\begin{array}{ccc} \mathrm{k}_{00} \mathrm{v}_{00} & \cdots & \mathrm{k}_{00} \mathrm{v}_{0 c} \\ \vdots & \ddots & \vdots \\ \mathrm{k}_{0 \mathrm{c}} \mathrm{v}_{00} & \cdots & \mathrm{k}_{0 \mathrm{c}} \mathrm{v}_{0 c} \end{array}\right] \right)$
RWKV-6
Dynamic Mix & Dynamic Decay。示例(TimeMix 和 ChannelMix 均如此):
TIME_MIX_EXTRA_DIM = 32
self.time_mix_k_w1 = nn.Parameter(torch.empty(args.n_embd, TIME_MIX_EXTRA_DIM).uniform_(-0.01, 0.01))
self.time_mix_k_w2 = nn.Parameter(torch.zeros(TIME_MIX_EXTRA_DIM, args.n_embd))
self.time_mix_v_w1 = nn.Parameter(torch.empty(args.n_embd, TIME_MIX_EXTRA_DIM).uniform_(-0.01, 0.01))
self.time_mix_v_w2 = nn.Parameter(torch.zeros(TIME_MIX_EXTRA_DIM, args.n_embd))
self.time_mix_r_w1 = nn.Parameter(torch.empty(args.n_embd, TIME_MIX_EXTRA_DIM).uniform_(-0.01, 0.01))
self.time_mix_r_w2 = nn.Parameter(torch.zeros(TIME_MIX_EXTRA_DIM, args.n_embd))
self.time_mix_g_w1 = nn.Parameter(torch.empty(args.n_embd, TIME_MIX_EXTRA_DIM).uniform_(-0.01, 0.01))
self.time_mix_g_w2 = nn.Parameter(torch.zeros(TIME_MIX_EXTRA_DIM, args.n_embd))
...
time_mix_k = self.time_mix_k.view(1,1,-1) + (x @ self.time_mix_k_w1) @ self.time_mix_k_w2
time_mix_v = self.time_mix_v.view(1,1,-1) + (x @ self.time_mix_v_w1) @ self.time_mix_v_w2
time_mix_r = self.time_mix_r.view(1,1,-1) + (x @ self.time_mix_r_w1) @ self.time_mix_r_w2
time_mix_g = self.time_mix_g.view(1,1,-1) + (x @ self.time_mix_g_w1) @ self.time_mix_g_w2

xx = self.time_shift(x)
xk = x * time_mix_k + xx * (1 - time_mix_k)
xv = x * time_mix_v + xx * (1 - time_mix_v)
xr = x * time_mix_r + xx * (1 - time_mix_r)
xg = x * time_mix_g + xx * (1 - time_mix_g)

RWKV-7
Use parallelized mode to quickly generate the state, then use a finetuned full RNN (the layers of token n can use outputs of all layer of token n-1) for sequential generation.
Some old ideas
-
Now time decay is like 0.999^T (0.999 is learnable). Change it to something like (0.999^T + 0.1) where 0.1 is learnable too. The 0.1 part will be kept forever. Or, A^T + B^T + C = fast-decay + slow-decay + constant. Can even use different formulas (for example, K^2 instead of e^K for a decay component, or, without normalization).
-
Use complex-valued decay (so, rotation instead of decay) in some channels.
-
Inject some trainable and extrapolatable positional encoding?
-
Aside from 2d rotation, we can try other Lie groups such as 3d rotation ( SO(3) ). Non-abelian RWKV lol.
-
RWKV might be great on analog devices (search for Analog Matrix-vector multiplication & Photonic Matrix-vector multiplication). The RNN mode is very hardware-friendly (processing-in-memory). Can be a SNN too (https://github.com/ridgerchu/SpikeGPT). I wonder if it can be optimized for quantum computation.
-
Trainable initial hidden state (xx aa bb pp xx).
-
Layerwise (or even row/column-wise, elementwise) LR, and test Lion optimizer.
Vision Tasks
- I find it's good to add a 2d pos encoding:
self.pos_emb_x = nn.Parameter(torch.zeros((1,args.my_pos_emb,args.n_embd)))
self.pos_emb_y = nn.Parameter(torch.zeros((args.my_pos_emb,1,args.n_embd)))
...
x = x + pos_emb_x + pos_emb_y
- In a BPE langauge model, it's the best to use [tokenShift of 1 token] (you can mix more tokens in a char-level English model). However you can try [tokenShift of N (or N-1) (or N+1) tokens] if the image size is N x N, because that will be like mixing [the token above the current positon (or the token above the to-be-predicted positon)] with [current token]. You can use try different tokenShift styles for "ATT" & "FFN", or mixing different tokenShift styles - such as mixing [token A] with [token A-1] and [token A-(N-1)] etc.
Misc
Maybe we can improve memorization by simply repeating the context (I guess 2 times is enough). Example: Reference -> Reference(again) -> Question -> Answer
Idea: Bytes-aware Embedding
The idea is to make sure each token in vocab understand its length and raw UTF-8 bytes.
Let a = max(len(token)) for all token in vocab. Define AA : float[a][d_emb]
Let b = max(len_in_utf8_bytes(token)) for all token in vocab. Define BB : float[b][256][d_emb]
For each token X in vocab, let [x0, x1, ..., xn] be its raw UTF-8 bytes. We will add some extra values to its embedding EMB(X):
EMB(X) += AA[len(X)] + BB[0][x0] + BB[1][x1] + ... + BB[n][xn] (note: AA BB are learnable weights)
- We can do this for the final Linear(d_emb, n_vocab) projection too.
- We can use some small networks to generate AA and BB, for some extra regularization (for example, BB[m][xi] and BB[n][xi] should be related).
Old Idea
I have an idea to improve tokenization. We can hardcode some channels to have meanings. Example:
Channel 0 = "space"
Channel 1 = "capitalize first letter"
Channel 2 = "capitalize all letters"
Therefore:
Embedding of "abc": [0, 0, 0, x0, x1, x2 , ..]
Embedding of " abc": [1, 0, 0, x0, x1, x2, ..]
Embedding of " Abc": [1, 1, 0, x0, x1, x2, ..]
Embedding of "ABC": [0, 0, 1, x0, x1, x2, ...]
......
so they will share most of the embedding. And we can rapidly compute the output probability of all variations of "abc".
Note: the above method is assuming that p(" xyz") / p("xyz") is the same for any "xyz", which can be wrong.
Better: define emb_space emb_capitalize_first emb_capitalize_all to be a function of emb.
Maybe the Best: let 'abc' ' abc' etc. to share the last 90% of their embeddings.
At this moment, all our tokenizers spend too many items to represent all variations of 'abc' ' abc' ' Abc' etc. Moreover the model cannot discover that these are actually similar if some of these variations are rare in the dataset. The method here can improve this. I plan to test this in a new version of RWKV.
Idea: Better Initial States
Example (single-round Q & A):
-
Generate the final state of all wiki documents.
-
For any user Q, find the best wiki document, and use its final state as the initial state.
-
Train a model to directly generate the optimal initial state for any user Q.
However this can be a bit more tricky for multi-round Q & A :)
How it works
RWKV is inspired by Apple's AFT (https://arxiv.org/abs/2105.14103).
Moreover it's using a number of my tricks, such as:
-
SmallInitEmb: https://github.com/BlinkDL/SmallInitEmb (applicable to all transformers) which helps the embedding quality, and stabilizes Post-LN (which is what I am using).
-
Token-shift: https://github.com/BlinkDL/RWKV-LM#token-shift-time-shift-mixing (applicable to all transformers), especially helpful for char-level models.
-
Head-QK: https://github.com/BlinkDL/RWKV-LM#the-head-qk-trick-learning-to-copy-and-avoid-tokens (applicable to all transformers). Note: it's helpful, but I disabled it in the Pile model to keep it 100% RNN.
-
Extra R-gate in the FFN (applicable to all transformers). I am also using reluSquared from Primer.
-
Better initilization: I init most of the matrices to ZERO (see RWKV_Init in https://github.com/BlinkDL/RWKV-LM/blob/main/RWKV-v2-RNN/src/model.py).
-
You can transfer some parameters from a small model to a large model (note: I sort & smooth them too), for faster and better convergence (see https://www.reddit.com/r/MachineLearning/comments/umq908/r_rwkvv2rnn_a_parallelizable_rnn_with/).
-
My CUDA kernel: https://github.com/BlinkDL/RWKV-CUDA to speedup training.
The pseudocode (execution from top to bottom):

The a b c d factors work together to build a time-decay curve: [X, 1, W, W^2, W^3, ...].
Write out the formulas for "token at pos 2" and "token at pos 3" and you will get the idea:
- a and b: EMAs of kv and k.
- c and d: these are a and b combined with "self-attention".
kv / k is the memory mechanism. The token with high k can be remembered for a long duration, if W is close to 1 in the channel.
The R-gate is important for performance. k = info strength of this token (to be passed to future tokens). r = whether to apply the info to this token.
RWKV-3 improvements
Use different trainable TimeMix factors for R / K / V in SA and FF layers. Example:
xx = self.time_shift(x)
xk = x * self.time_mix_k + xx * (1 - self.time_mix_k)
xv = x * self.time_mix_v + xx * (1 - self.time_mix_v)
xr = x * self.time_mix_r + xx * (1 - self.time_mix_r)
使用 preLN 而非 postLN(更稳定且收敛更快):
if self.layer_id == 0:
	x = self.ln0(x)
x = x + self.att(self.ln1(x))
x = x + self.ffn(self.ln2(x))
解读 RWKV-3 GPT 模式代码
GPT 模式 - 概述
RWKV-3 GPT 模式的构建模块与常规的 preLN GPT 类似。
唯一的区别是在 embedding 之后多了一层 LN。注意,训练完成后可以将该 LN 吸收进 embedding 中。
x = self.emb(idx)  # input: idx = token indices
x = self.ln_emb(x) # extra LN after embedding
x = x + self.att_0(self.ln_att_0(x)) # preLN
x = x + self.ffn_0(self.ln_ffn_0(x))
...
x = x + self.att_n(self.ln_att_n(x))
x = x + self.ffn_n(self.ln_ffn_n(x))
x = self.ln_head(x) # final LN before projection
x = self.head(x)    # output: x = logits
将 emb 初始化为极小值非常重要,例如 nn.init.uniform_(a=-1e-4, b=1e-4),以便利用我的技巧 https://github.com/BlinkDL/SmallInitEmb.
对于 1.5B 的 RWKV-3,我在 8 块 A100 40G 上使用 Adam 优化器(无 weight decay,无 dropout)。
batchSz = 32 * 896,ctxLen = 896。我使用了 tf32,因此 batchSz 略小。
在前 15B tokens 期间,学习率固定为 3e-4,beta=(0.9, 0.99)。
随后将 beta 设为 (0.9, 0.999),并对学习率进行指数衰减,在 332B tokens 时降至 1e-5。
GPT 模式 - ATT 块
RWKV-3 严格意义上并不包含常规 attention,但我们仍将此块称为 ATT。
B, T, C = x.size() # x = (Batch,Time,Channel)

# 将 x 与上一时间步混合以生成 xk、xv、xr
xx = self.time_shift(x) # self.time_shift = nn.ZeroPad2d((0,0,1,-1))
xk = x * self.time_mix_k + xx * (1 - self.time_mix_k)
xv = x * self.time_mix_v + xx * (1 - self.time_mix_v)
xr = x * self.time_mix_r + xx * (1 - self.time_mix_r)

# 使用 xk、xv、xr 生成 k、v、r
k = self.key(xk).transpose(-1, -2)
v = self.value(xv).transpose(-1, -2)
r = self.receptance(xr)
k = torch.clamp(k, max=60) # 将 k 截断以避免溢出
k = torch.exp(k)
kv = k * v

# 计算 W 曲线 = [e^(-n * e^time_decay), e^(-(n-1) * e^time_decay), ..., 1, e^(time_first)]
self.time_w = torch.cat([torch.exp(self.time_decay) * self.time_curve.to(x.device), self.time_first], dim=-1)
w = torch.exp(self.time_w)

# 分别用 W 混合 kv 和 k。向 wk 添加 K_EPS 以避免除以零
if RUN_DEVICE == 'cuda':
    wkv = TimeX.apply(w, kv, B,C,T, 0)
    wk = TimeX.apply(w, k, B,C,T, K_EPS)
else:
    w = w[:,-T:].unsqueeze(1)
    wkv = F.conv1d(nn.ZeroPad2d((T-1, 0, 0, 0))(kv), w, groups=C)
    wk = F.conv1d(nn.ZeroPad2d((T-1, 0, 0, 0))(k), w, groups=C) + K_EPS

# RWKV 公式
rwkv = torch.sigmoid(r) * (wkv / wk).transpose(-1, -2)
rwkv = self.output(rwkv) # 最终输出投影
The self.key, self.receptance, self.output matrices are all initialized to zero.
The time_mix, time_decay, time_first vectors are transferred from a smaller trained model (note: I sort & smooth them too).
The GPT mode - FFN block
The FFN block has three tricks comparing with the usual GPT:
-
My time_mix trick.
-
The sqReLU from the Primer paper.
-
An extra receptance-gate (similar to the receptance-gate in ATT block).
# Mix x with the previous timestep to produce xk, xr
xx = self.time_shift(x)
xk = x * self.time_mix_k + xx * (1 - self.time_mix_k)
xr = x * self.time_mix_r + xx * (1 - self.time_mix_r)

# The usual FFN operation
k = self.key(xk)
k = torch.square(torch.relu(k)) # from the Primer paper
kv = self.value(k)

# Apply an extra receptance-gate to kv
rkv = torch.sigmoid(self.receptance(xr)) * kv
return rkv
self.value、self.receptance 矩阵均初始化为零。
RWKV-4 改进

从 GPT 到 RWKV(公式)
设 F[t] 为时刻 t 的系统状态。
设 x[t] 为时刻 t 的新外部输入。
在 GPT 中,预测 F[t+1] 需要考虑 F[0]、F[1]、.. F[t]。因此生成长度为 T 的序列需要 O(T^2) 时间。
GPT 的简化公式:
理论上它能力很强,然而这并不意味着用常规优化器就能充分发挥其能力。我怀疑损失景观(loss landscape)对当前方法而言过于困难。
对比 RWKV 的简化公式(并行模式,看起来与 Apple 的 AFT 类似):
R、K、V 是可训练矩阵,W 是可训练向量(每个通道的时间衰减因子)。
在 GPT 中,F[i] 对 F[t+1] 的贡献由 . 加权。
在 RWKV-2 中,F[i] 对 F[t+1] 的贡献由 . 加权。
是非线性函数,我们可以使用 sigmoid。
- 注意
不在分母中,我将 R 称为「receptance(感受度)」。
是时间衰减因子。我在 2020 年 8 月提出了同样的想法(按距离缩放注意力),称之为「time-weighting(时间加权)」(可查看 https://github.com/BlinkDL/minGPT-tuned). 的提交历史)。
关键之处在于:我们可以将其改写为 RNN(递归公式)。注意:
因此很容易验证:
其中 A[t] 和 B[t] 分别是上一步的分子和分母。
我认为 RWKV 性能出色,是因为 W 类似于反复应用对角矩阵。注意 (P^{-1} D P)^n = P^{-1} D^n P,因此它类似于反复应用一般可对角化矩阵。
此外,还可以将其转化为连续 ODE(与 State Space Models 有些相似)。我稍后会撰文介绍。
Star History
多模态思路
我有一个用 LM(transformer、RWKV 等)实现 [text --> 32x32 RGB image] 的想法。很快会测试。
首先,使用 LM 损失(而非 L2 损失),这样图像不会模糊。
其次,颜色量化。例如,R/G/B 各只允许 8 个级别。那么图像词表大小为 8x8x8 = 512(每个像素),而不是 2^24。 因此,一张 32x32 RGB 图像 = 长度为 1024、词表为 512 的序列(图像 token),这是常规 LM 的典型输入。 (之后可以用扩散模型上采样并生成 RGB888 图像。也许也能用 LM 来做这件事。)
第三,便于模型理解的二维位置嵌入(2D positional embeddings)。 例如,将 one-hot 的 X 和 Y 坐标加到前 64(=32+32)个通道。若像素位于 x=8、y=20,则向通道 8 和通道 52(=32+20)各加 1。 此外,可能还可以将浮点 X 和 Y 坐标(归一化到 0~1 范围)加到另外 2 个通道。其他周期性位置编码(periodic pos. encoding)或许也有帮助(会测试)。
最后,在 DataLoader 中进行颜色量化时使用 RandRound。 例如,若浮点级别为 4.578,则有 57.8% 的概率使用 5,(1-57.8%) 的概率使用 4。 预测时 4 和 5 都可以,但若预测为 4,损失会更高。
多任务训练或许也有帮助。我会尝试这种数据集格式: [TxtFirst] [Desc of Img (txt tokens)] [Img] [img tokens] 有时则为 [ImgFirst] [img tokens] [Txt] [Desc of Img (txt tokens)] ... DataLoader 中图像顺序应随机化,[TxtFirst]、[ImgFirst]、[Img]、[Txt] 为特殊 token, 并对完整数据集做随机采样。这样模型有时会先看到 img token 再看到对应的 txt token,即 [img -> txt] 任务。模型还会看到一些不完整的图像和不完整的文本。我认为字符级 LM 可能有助于模型在图像上写出正确文字。
如何采样大型数据集(用于训练)
我用一个小技巧来采样 Pile,既确定性又足够随机。
假设 pile 有 x 个 chunk(一个 chunk = ctx_len 个 token)。
选取略小于 x 的质数 p,并确保 p = 2 (mod 3)。
用 (step * step * step) mod p 来采样。给 step 加一些偏置以增加随机性。
top-p-x 采样方法(用于推理)
我们提出一种新的采样方法 top-p-x:
它类似 top-p,唯一区别是你还会保留所有 prob > x 的 token。
先试 x = 0.01。
通过损失曲线的变分法获得更好的学习率调度
我提出一种简单的新方法来寻找更好的 LR 调度。该方法成本低,适用于大型 LM。要点是:我们可以对损失曲线随 LR 的动力学(唯象学,phenomenology)建模,并用变分法(variantional method)直接计算出优美的闭式 LR 曲线。此外还能以合理精度预测最终损失。
UPDATE:在「Conclusion 1.」中,使用拟合最好的区间(忽略近似失效的初始步)来拟合参数。
可尝试:固定 lr 1 小时,然后在 12 小时内指数衰减到 0.2 * lr,并选取 t=[1hr, 13hr] 段。
最后三张图中,黑色 = 新 LR 调度的预测损失曲线,蓝色 = 原始(未优化)真实损失曲线,橙色 = 新 LR 调度。

RWKV v1
我们提出 RWKV 语言模型,采用交替的 time-mix 与 channel-mix 层:
-
R、K、V 由输入的线性变换生成,W 是参数。RWKV 的思路是将注意力分解为 R(target) * W(src, target) * K(src)。因此我们将 R 称为「receptance」,sigmoid 表示其取值在 0~1 范围。
-
Time-mix 与 AFT 类似(https://arxiv.org/abs/2105.14103). 有两处不同。
(1) 我们修改了归一化(分母)。对于掩码语言模型,我们定义:
(UPDATE:v2 中我们使用原始 AFT 归一化)
将 K 和 R 矩阵(以及输出投影矩阵)初始化为 ZERO,以实现快速且稳定的收敛。
(2) 我们分解 W_{t,u,c} 并引入多头 W(此处 h 为 c 对应的头):
此外,我们将 Time-mix 层的最终输出乘以 γ(t)。α、β、γ 因子的原因是:当 t 较小时上下文规模更小,可用 α、β、γ 因子加以补偿。
(UPDATE:在 v2-RNN 中我们移除 α、β、γ 因子,并将 W 限制为简单形式,从而可改写为 RNN)
-
Channel-mix 与 GeGLU 类似(https://arxiv.org/abs/2002.05202) 多了一个 R 因子。将 R 和 W 矩阵初始化为 ZERO,以实现快速且稳定的收敛。
-
最后,我们像(https://github.com/BlinkDL/minGPT-tuned). 那样添加额外的 token-shift(time-shift mixing)。
Token-shift(time-shift mixing)
Token-shift 显式使用(本 token 的一半通道)与(上一 token 的一半通道)来生成所有向量(QKV、RWKV 等)。
self.time_shift = nn.ZeroPad2d((0,0,1,-1))
x = torch.cat([self.time_shift(x[:, :, :C//2]), x[:, :, C//2:]], dim = -1)
Dividing channels by 2 and shift-1 works great for char-level English and char-level Chinese LM.

However for BPE-level English LM, it's only effective if your embedding is large enough (at least 1024 - so the usual small L12-D768 model is not enough).

My theory on the effectiveness of token-shift:

When we train a GPT, the hidden representation of a token has to accomplish two different objects:

1. Predict the next token. Sometimes this is easy (obvious next token).

2. Collect all previous context info, so later tokens can use it. This is always hard.

The shifted channels can focus on (2), so we have good propagation of info. It's like some kind of residual connection, or a small RNN inside the transformer.

You can use token-shift in usual QKV self-attention too. I looked at the weights, and found V really likes the shifted channels, less so for Q. Makes sense if you think about it. I also found you may want to use less mixing in higher layers.

p.s. There is a MHA_pro model in this repo with strong performance. Give it a try :)

# The Head-QK Trick: learning to copy and avoid tokens

In usual transformer, a small model has difficulty copying tokens (such as person names) in the context. We add extra Q & K to the final output such that the model can directly copy (or avoid) tokens in the context. Afterwards the model will teach itself NER (named entity recognition) if you look at the learned weights.
q = self.head_q(x)[:,:T,:] # projecting to 256-d
k = self.head_k(x)[:,:T,:] # projecting to 256-d
c = (q @ k.transpose(-2, -1)) * (1.0 / 256)
c = c.masked_fill(self.copy_mask[:T,:T] == 0, 0)
c = c @ F.one_hot(idx, num_classes = self.config.vocab_size).float()
x = self.head(x) + c
Note: when a token occurs multiple times in the context, it might be better to use max(prob) instead of sum(prob).

# The top-a sampling method

We also propose a new sampling method called top-a (as in src/utils.py):

(1) Find the max probability p_max after softmax.

(2) Remove all entries whose probability is lower than 0.2 * pow(p_max, 2). So it's adaptive, hence "top-a".

(3) Feel free to tune the 0.2 and 2 factor. Tune 0.2 first.

The idea of top-a:
1. If max_prob=0.9, then remove all tokens with prob < 0.162 (so, removing all alternatives)
2. If max_prob=0.5, then remove all tokens with prob < 0.05  (so, allowing more choices)
3. If max_prob=0.1, then remove all tokens with prob < 0.002 (so, allowing lots of possibilities)
probs = F.softmax(logits, dim=-1)
limit = torch.pow(torch.max(probs), 2) * 0.02 logits[probs < limit] = -float('Inf')
# Performance
Character-level loss on simplebooks-92 dataset https://dldata-public.s3.us-east-2.amazonaws.com/simplebooks.zip

Gray: usual MHA+Rotary+GeGLU - performance not as good. 17.2M params.
Red: RWKV ("linear" attention) - VRAM friendly - quite faster when ctx window is long - good performance. 16.6M params.
Green: MHA+Rotary+GeGLU+Token_shift. 17.2M params.
Blue: MHA_pro (MHA with various tweaks & RWKV-type-FFN) - slow - needs more VRAM - good performance. 16.6M params.
@software{peng_bo_2021_5196578, author = {PENG Bo}, title = {BlinkDL/RWKV-LM: 0.01}, month = aug, year = 2021, publisher = {Zenodo}, version = {0.01}, doi = {10.5281/zenodo.5196577}, url = {https://doi.org/10.5281/zenodo.5196577} }
# 初始化
我们对 RWKV 采用精心设计的初始化以加快收敛——使用带合适缩放的正交矩阵(orthogonal matrices),以及特殊的 time_w 曲线。详见 model.py。
部分学习得到的 time_w 示例如下:
